Homework Assignments: Lesson 2
Contents:
- 2.1: Create and Start Activities
- 2.2: The Activity Lifecycle and Managing State
- 2.3: Start Activities with Implicit Intents
2.1: Create and Start Activities
Build and run an app
Open the HelloToast app that you created in the Make Your First Interactive UI lesson.
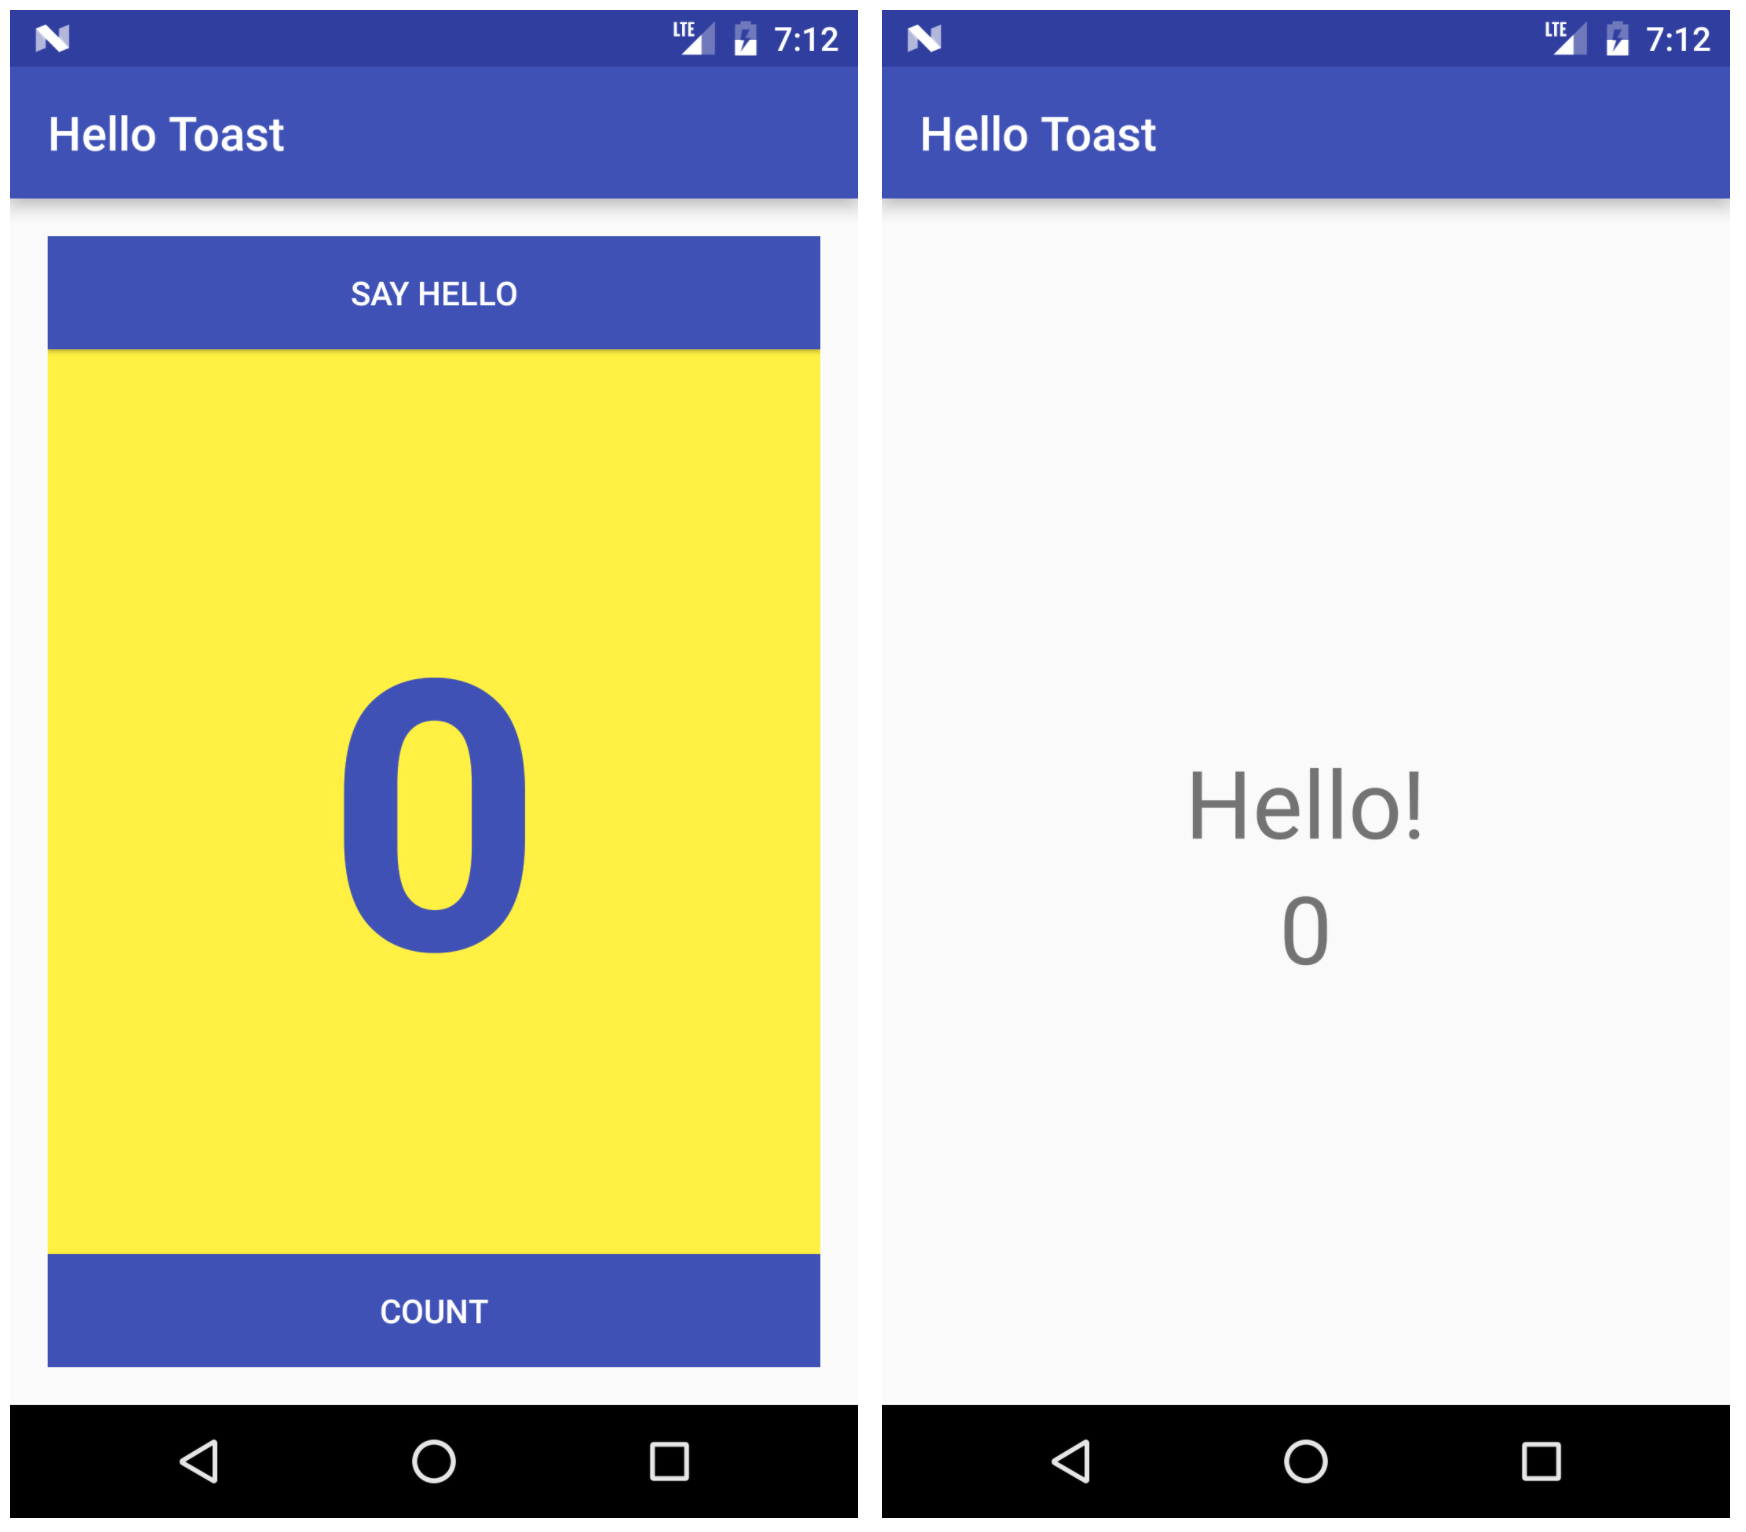
- Modify the toast button so that it launches a new activity to display the word "Hello!" and the current count, as shown below.
- Change the text on the toast button.

Answer these questions
Question 1
What menu command do you use to add a new activity to your app?
Question 2
What files are added when you add a new activity called HelloActivity to your app? What changes are made to existing files?
Question 3
Which constructor method do you use to create a new explicit intent?
new Intent()new Intent(Context context, Class<?> class)new Intent(String action, Uri uri)new Intent(String action)
Question 4
How do you add the current value of the count to the intent?
- As the intent data
- As an intent action
- As an intent extra
Question 5
How do you update the count in HelloActivity to display the current count?
- Get the intent the activity was launched with.
- Get the current count value out of the intent.
- Update the text view for the count.
- All of the above.
Submit your app for grading
Guidance for graders
Check that the app has the following features:
- It displays the Hello button instead of the Hello Toast button.
- The HelloActivity starts when the Hello button is pressed, and the new activity displays the message "Hello!" and the current count from the main activity.
- The HelloActivity.java and activity_hello.xml files have been added to the project.
- The activity_hello.xml file contains two text view objects, one with the string Hello! and the second with the count.
- It includes an implementation of a click handler method for the Hello button (in MainActivity).
- It includes an implementation of the
onCreate()method for the HelloActivity and updates the count TextView with the count from MainActivity.
2.2: The Activity Lifecycle and Managing State
Build and run an app
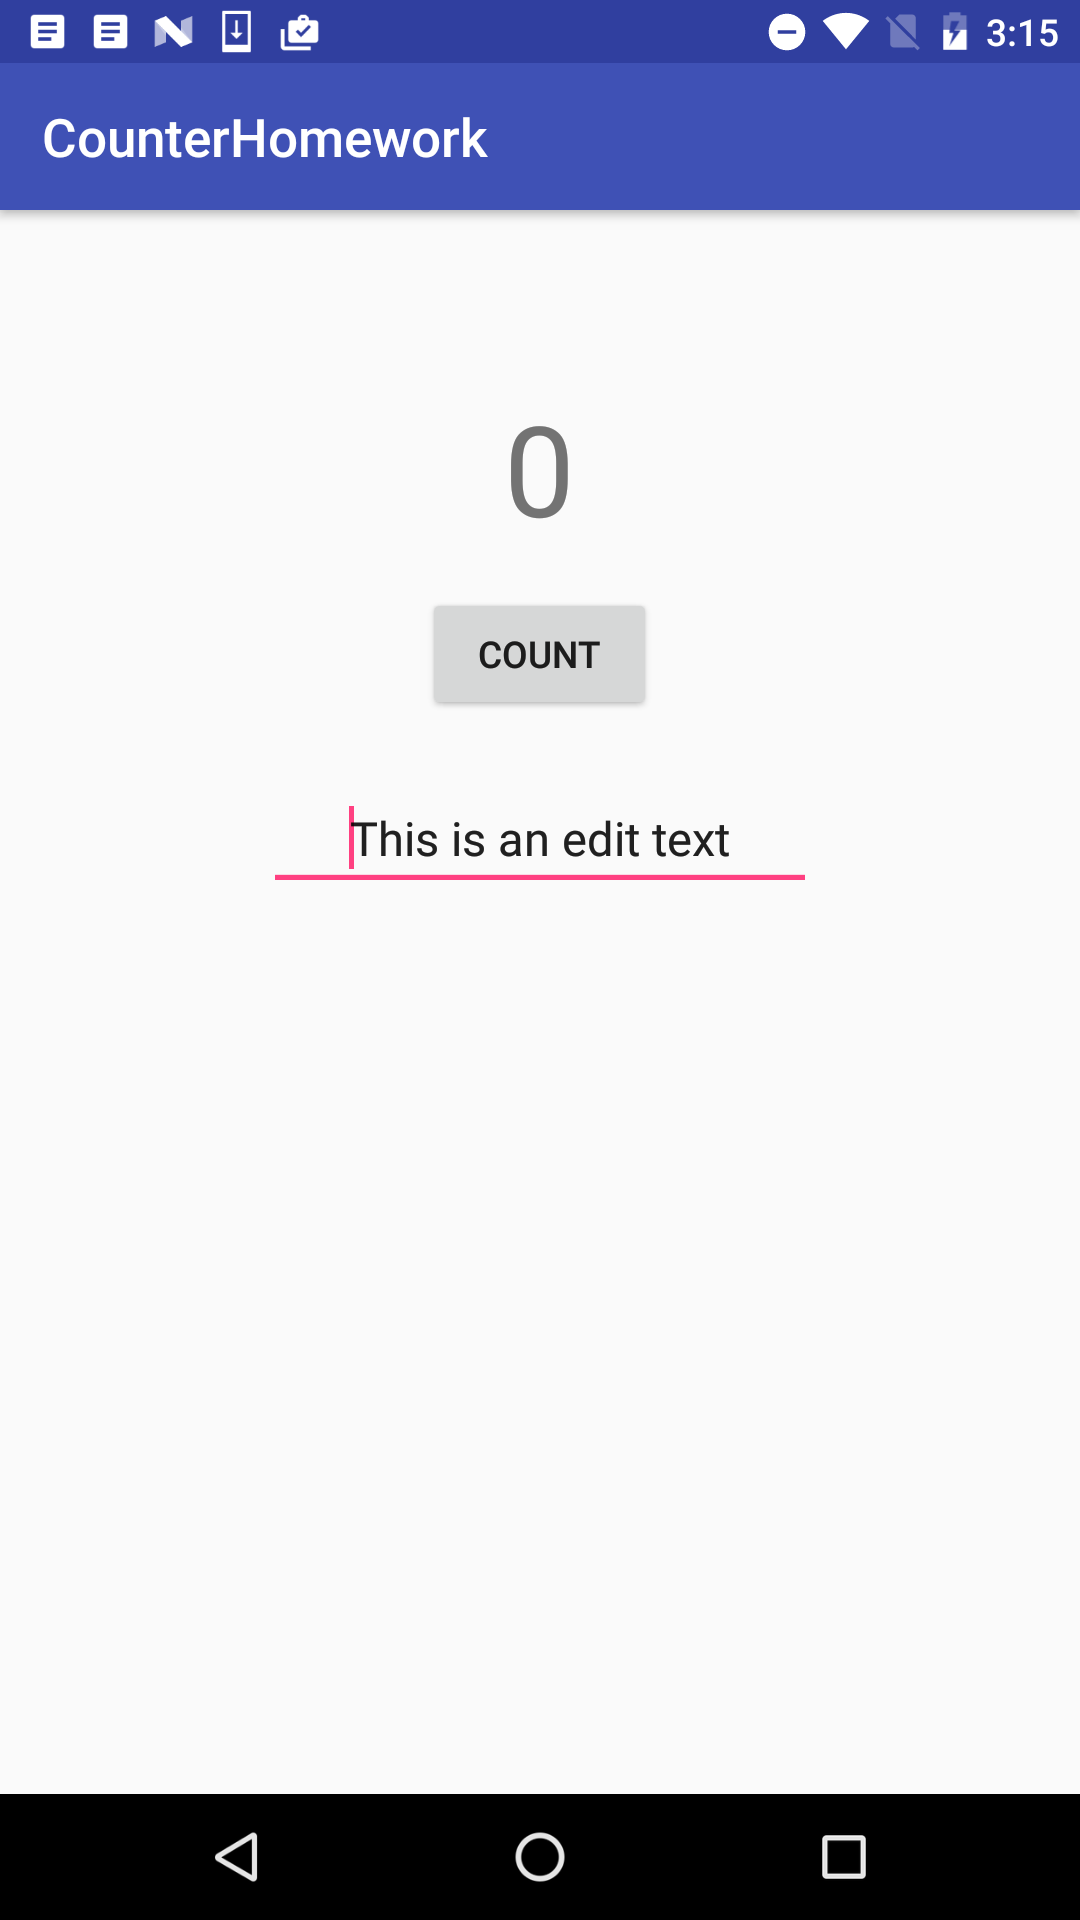
- Create an app with a layout that holds a counter, a button to increment the counter, and an edit text. See the screenshot below as a sample. You don't have to precisely duplicate the layout.
- Add a click handler for the button that increments the counter.
- Run the app and increment the counter. Enter some text into the edit text.
- Rotate the device. Note that the counter is reset, but the contents of the edit text is not.
- Implement
onSaveInstanceState()to save the current state of the app. - Update
onCreate()to restore the state of the app. - Rotate the device and ensure that the app state is preserved.

Answer these questions
Question 1
When you rotate the device (before you implement onSaveInstanceState()), the counter is reset to 0 but the contents of the edit text is preserved. Why?
Question 2
What Activity lifecycle methods are called when a device-configuration change (such as rotation) occurs?
Question 3
When in the Activity lifecycle is onSaveInstanceState() called?
Question 4
Which is the correct method signature for onSaveInstanceState():
void onSaveInstanceState(Bundle outState)void onSaveInstanceState()void onSaveInstanceState(Bundle outState, PersistableBundle outPersistentState)
Question 5
What is the difference between restoring your activity state in onCreate() versus in onRestoreInstanceState()?
Question 6
If you quit and restart your app, what happens to the Activity state?
Submit your app for grading
Guidance for graders
Check that the app has the following features:
- It displays a counter, a button to increment that counter, and an edit text.
- Clicking the button increments the counter by 1.
- When the device is rotated, both the counter and edit text state are retained.
- The implementation of MainActivity.java uses the
onSaveInstanceState()method to store the counter value. - The implementation of
onCreate()tests for the existence of theoutStatebundle. If that bundle exists, the counter value is restored and saved to the text view.
2.3: Start Activities with Implicit Intents
Build and run an app
Open the ImplicitIntents app that you created in the Start Activities with Implicit Intents lesson.
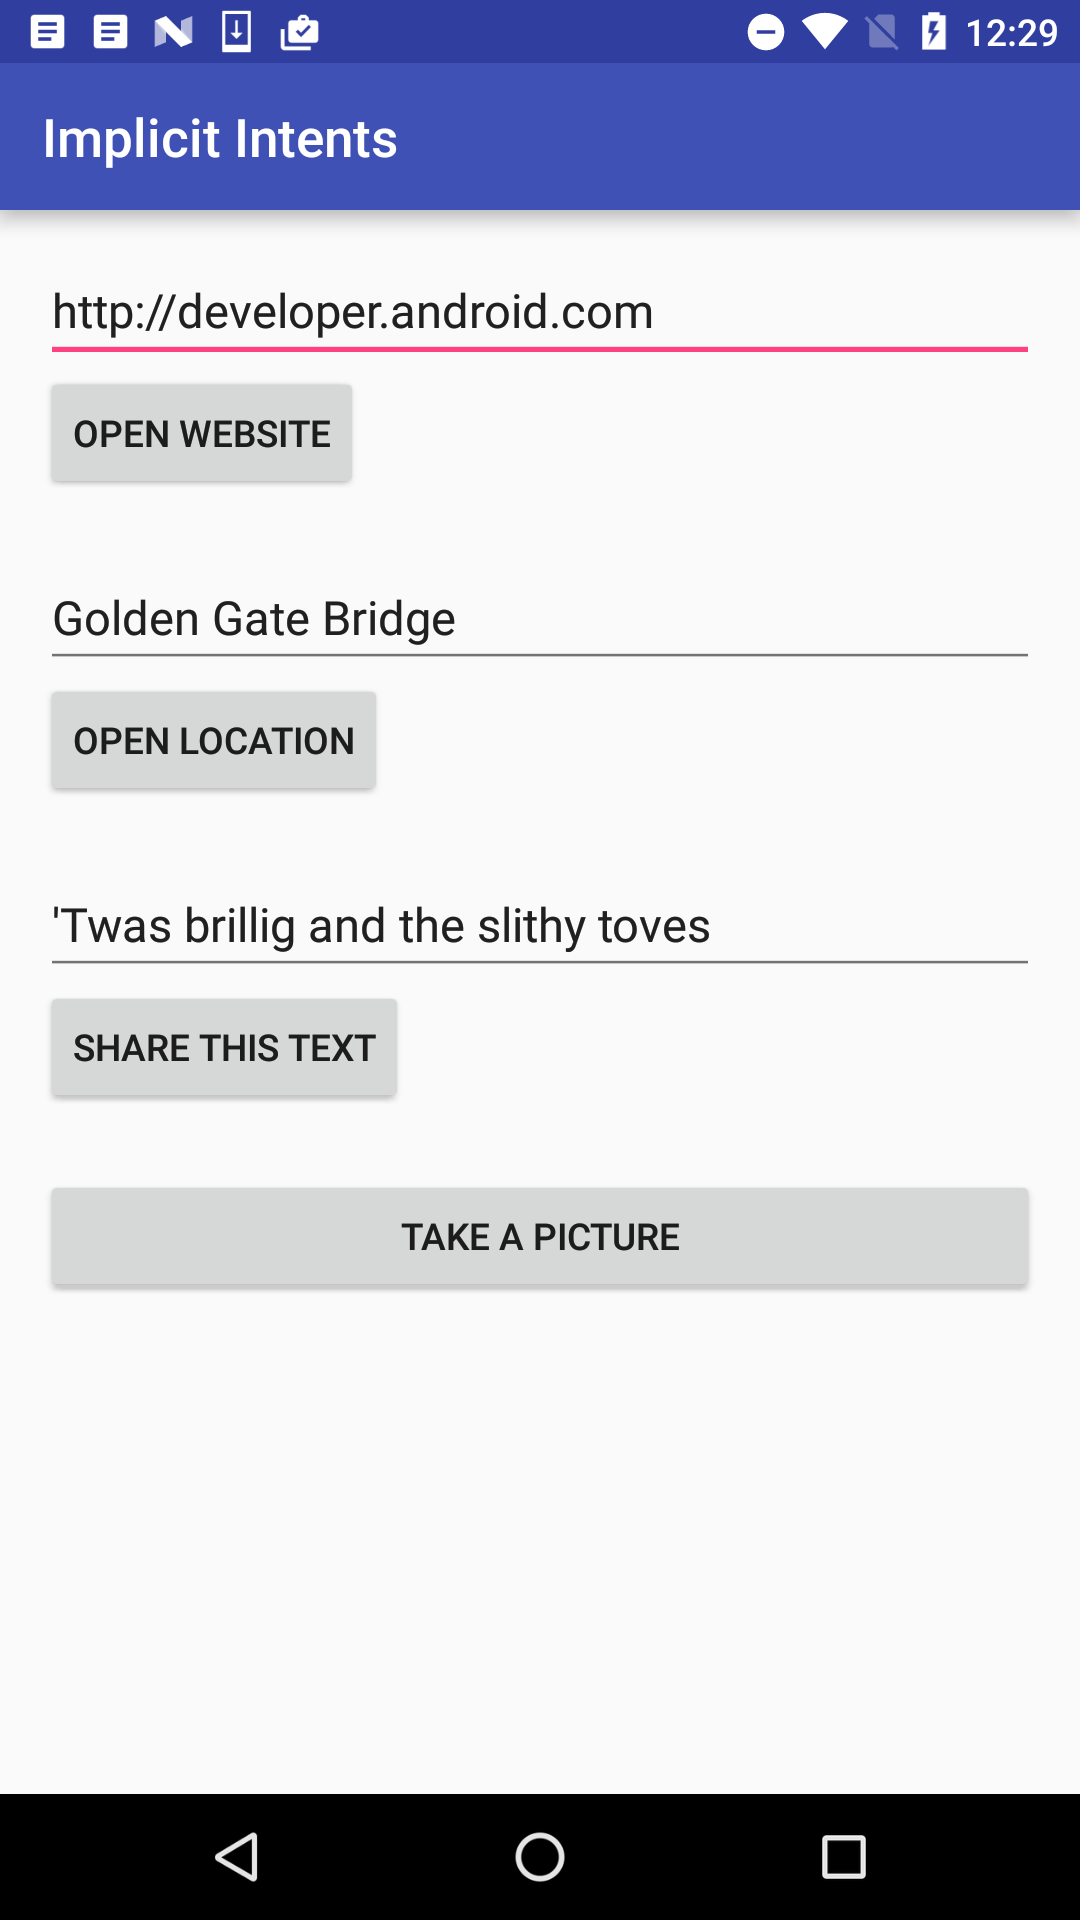
- Add another button at the bottom of the screen.
- When the button is clicked, launch a camera app to take a picture. (You don't need to return the picture to the original app.)Note: If you use the Android emulator to test the camera, open the emulator configuration in the Android AVD manager, choose Advanced Settings, and then choose "Emulated" for both front and back cameras. Restart your emulator if necessary.

Answer these questions
Question 1
Which constructor method do you use to create an implicit intent to launch a camera app?
new Intent()new Intent(Context context, Class<?> class)new Intent(String action, Uri uri)new Intent(String action)
Question 2
Which intent action do you use to request a camera app?
Submit your app for grading
Guidance for graders
Check that the app has the following features:
- It displays a "Take a Picture" button at the bottom of the app.
- When clicked, the button launches a camera app on the device.
- The on click method for the Take a Picture button ensures there is an available app on the device (with the resolveActivity() and getPackageManager() methods) before sending the intent.
