Homework Assignments: Lesson 3 & 4
Contents:
- 3.1: Debugging
- 3.2: Testing
- 3.3: Support Libraries and Backwards Compatibility
- 4.1: User Input Controls
- 4.2: Menus
- 4.3: Screen Navigation
- 4.4: RecyclerView
3.1: Debugging
Build and run an app
Open the SimpleCalc app from the Using the Debugger lesson.
- In MainActivity, place a breakpoint on the first line of the
onAdd()method. - Run the app in the debugger. Perform an add operation in the app. The execution stops at the breakpoint.
- Use the Step Into button to follow the execution of the app step by step. Note that Step Into opens and executes files from the Android framework, enabling you to see how Android itself operates on your code.
- Examine how the debugger windows change as you step through the code for the current stack frame and local variables.
- Examine how the code itself in the editor windows is annotated as each line is executed.
- Use the Step Out button to return back to your app if the execution stack gets too deep to understand.
Answer these questions
Question 1
What is the difference between Step Over and Step Into?
Question 2
How does each part of the debugger view change when you step into a new method?
Submit your app for grading
Guidance for graders
No app to submit for this homework assignment.
3.2: Testing
Build and run an app
Open the SimpleCalcTest app that you created in the Testing Apps with Unit Tests lesson. You're going to add an POW button to the layout. This button calculates the first operand raised to the power of the second operand. For example, given operands of 5 and 4, the app calculates 5 raised to the power of 4, or 625.
BEFORE you write the implementation of your power button, consider the kind of tests you might want to perform with this calculation. What unusual values may occur in this calculation?
- Update the Calculator class in the app to include a
pow()method. (Hint: Consult the documentation for the java.lang.Math class.) - Update the MainActivity class to connect the POW button to the calculation.
- Write each of the following tests for your
pow()method. Run your test suite each time you write a test, and fix the original calculation in your app if necessary.- A test with positive integer operands.
- A test with a negative integer as the first operand.
- A test with a negative integer as the second operand.
- A test with 0 as the first operand and a positive integer as the second operand.
- A test with 0 as the second operand.
- A test with 0 as the first operand and -1 as the second operand. (Hint: consult the documentation for
Double.POSITIVE_INFINITY.) - A test with -0 as the first operand and any negative number as the second operand.
Answer these questions
No questions.
Submit your app for grading
Guidance for graders
Check that the app has the following features:
- It displays a POW button that provides an exponential ("power of") calculation.
- The implementation of MainActivity includes an on click method for the POW button.
- The implementation of Calculator includes a
pow()method that performs the calculation. - The
CalculatorTestmethod includes separate test methods for thepow()method in the Calculator class that perform tests for negative and 0 operands, and for the case of 0 and -1 as the operands.
3.3: Support Libraries and Backwards Compatibility
Run an app
Open the HelloCompat app created in the Using the Android Support Libraries lesson.
- Set a debugger breakpoint on the line in the
changeColor()method that actually changes the color:int colorRes = ContextCompat.getColor(this, colorResourceName); Run the app in debug mode on a device or emulator that's running an API version 23 or higher. Step into the
getColor()method, following the method calls deeper into the stack. Examine how the ContextCompat class determines how to get the color from the resources, and which other framework classes it uses.Note: Some classes may produce a warning that the "source code does not match the bytecode." Click Step Out to return to a known source file, or keep clicking Step Into until the debugger returns on its own.Repeat the previous step for a device or emulator running an API version lower than 23. Note the different paths that the framework takes to accomplish getting the color.
Answer these questions
Question 1
Based on your exploration in the debugger, how does the Android platform decide which implementation to use in the Compat classes?
Question 2
Besides the differences in the method signatures, what is the difference between the implementations? Why is a compatibility class required at all?
Submit your app for grading
Guidance for graders
No app to submit for this homework assignment.
4.1: User Input Controls
Build and run an app
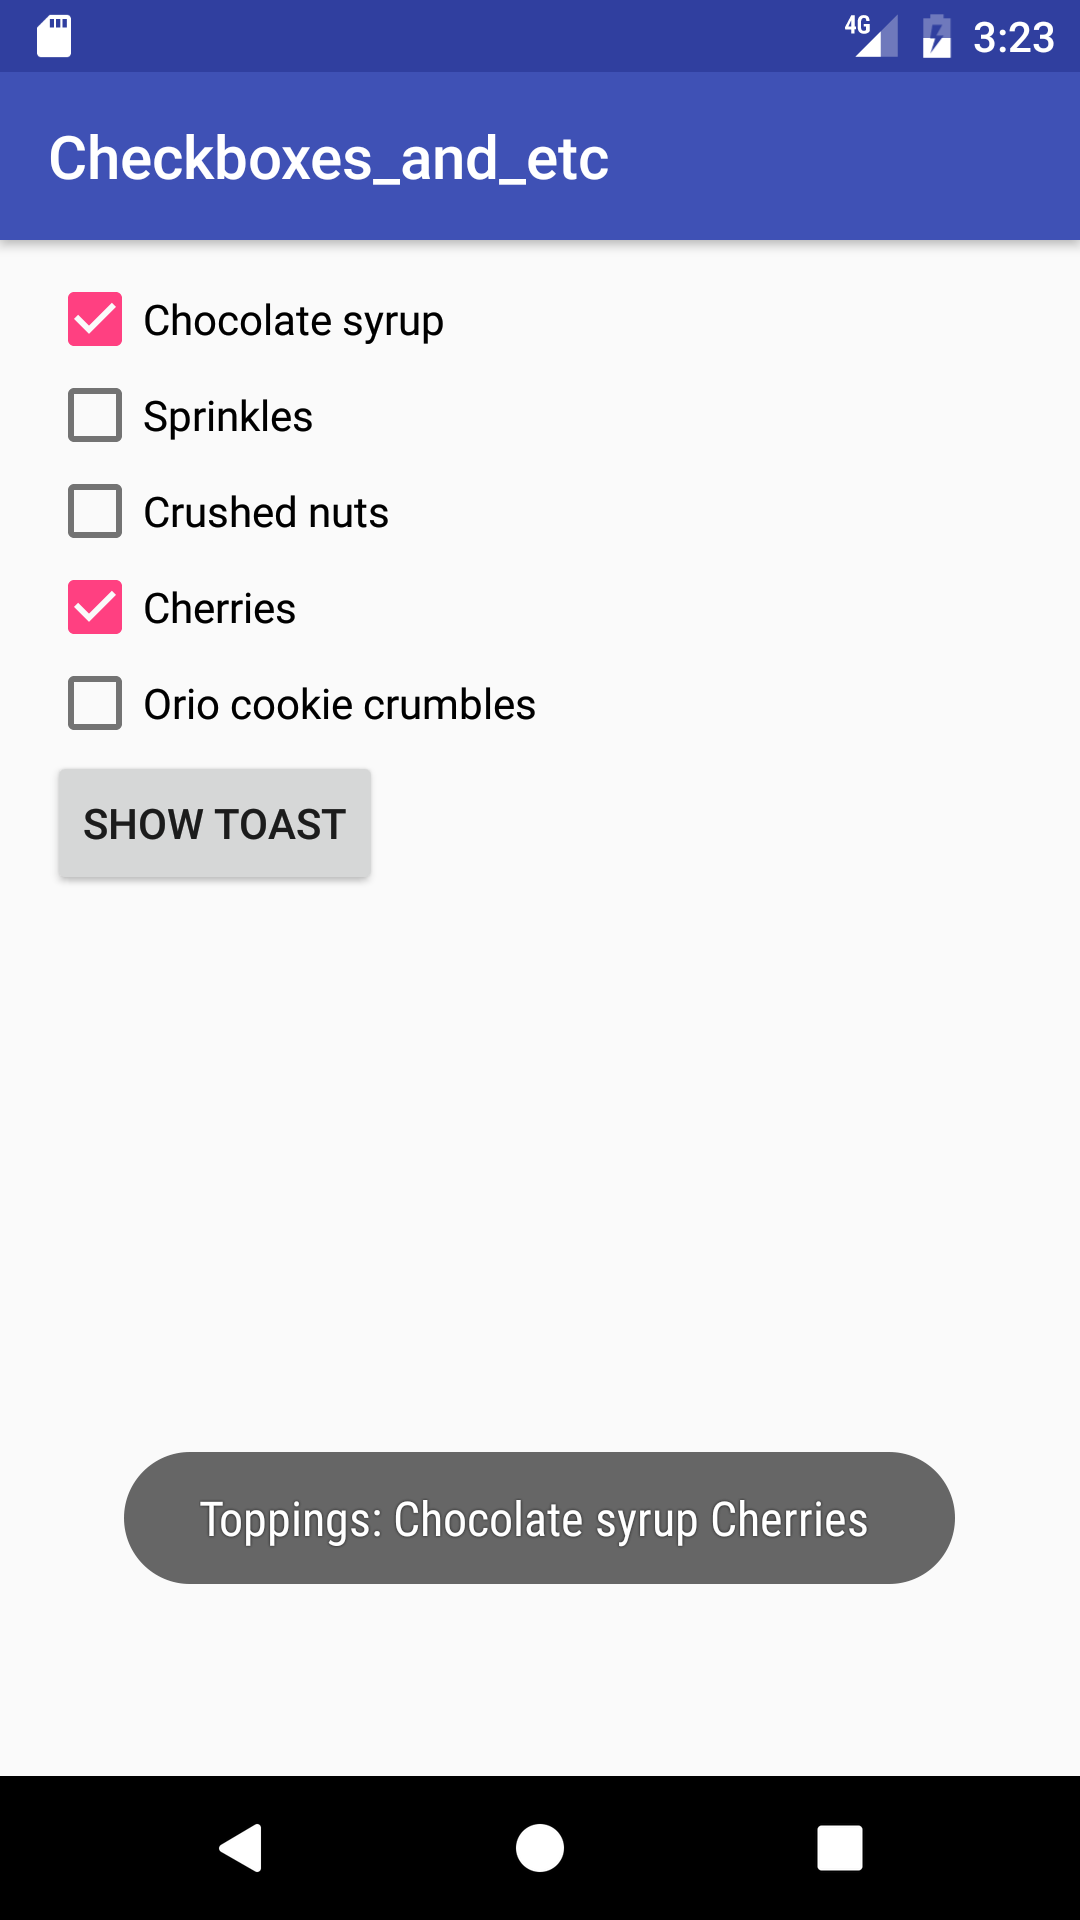
- Create an app with 5 checkboxes and a Show Toast button, as shown below.
- When the user clicks a single checkbox and then Show Toast, display a toast message showing the checkbox selected.
- If the user selects more than one checkbox and then Show Toast, show a toast that includes the messages for all selected checkboxes, as shown in the figure below.

Answer these questions
Question 1
What's the most important difference between checkboxes and a RadioGroup of radio buttons? Choose one:
- The only differences is how they appear: checkboxes show a checkmark when selected, while circular "radio" buttons appear filled when selected.
CheckBoxelements in the layout can use theandroid:onClickattribute to call a handler when selected.- The major difference is that checkboxes enable multiple selections, while a RadioGroup allows only one selection.
Question 2
Which layout group is the preferred way to align a set of CheckBox elements vertically? Choose one:
- RelativeLayout
- LinearLayout
- ScrollView
Question 3
What method of the Checkable interface do you use to check the state of a checkbox (that is, whether it has been checked or not)?
Submit your app for grading
Guidance for graders
Check that the app has the following features:
- The layout includes five CheckBox views vertically aligned on the screen, and a Show Toast button.
- The
onSubmit()method determines which checkbox is checked by usingfindViewById()withisChecked(). - The strings describing toppings are concatenated into a toast message.
4.2: Menus
Build and run an app
Open the ScrollingText app that you created in the Working with TextView Elements lesson.
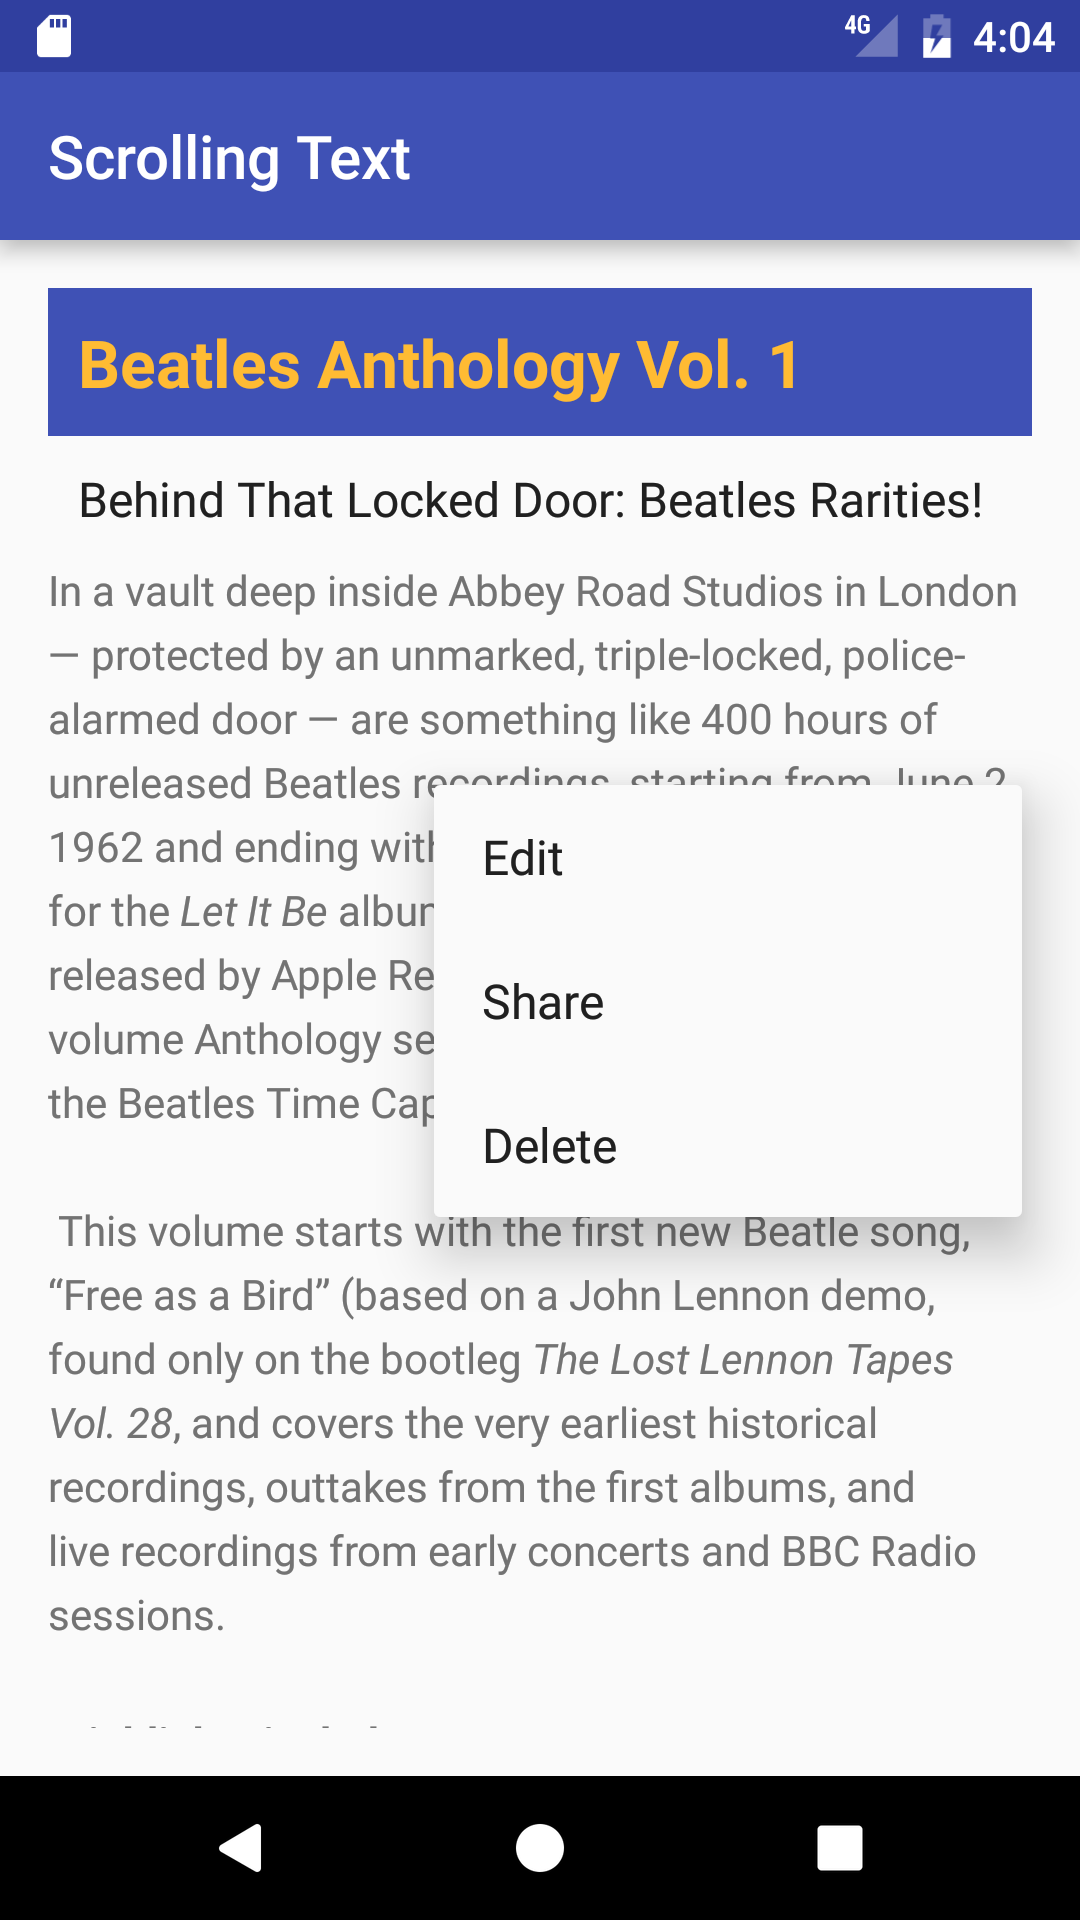
- Add a floating context menu to show three menu options: Edit, Share, and Delete, as shown in the figure below. The menu appears when the user performs a long click on the TextView.
- Add log messages to show which menu item was clicked.

Answer these questions
Question 1
What is the name and location of the file in which you create context menu items?
Question 2
What happens when a long tap (also known as a long click) occurs? Choose one:
- When a view receives a long-click event, the system calls the onCreateContextMenu() method, which you can't change.
- When a registered view receives a long-click event, the system calls the onCreateContextMenu() method, which you can override in your activity or fragment.
- When a registered view receives a long-click event, the system calls the onContextItemSelected() method, which you can override in your activity or fragment.
Question 3
Where do you register a context menu for a view? Choose one:
- Use
registerForContextMenu()in theonCreate()method. - Use
registerForContextMenu()in theonCreateContextMenu()method. - Use
getMenuInflater()in theonCreateContextMenu()method.
Question 4
Where do you inflate the context menu using MenuInflater? Choose one:
- In the
onCreate()method. - In the
onCreateContextMenu()method. - In the
onContextItemSelected()method.
Submit your app for grading
Guidance for graders
Check that the app has the following features:
- The
onCreateContextMenu()method is implemented in the MainActivity class and uses a MenuInflater to inflate the context menu. - The menu_context.xml file contains three options: Edit, Share, and Delete.
- The
onContextItemSelected()method is implemented and usesgetItemId()to determine which menu item is selected.
4.3: Screen Navigation
Build and run an app
Create an app with a main activity and at least three other activities. All activities have a basic Options menu and use the v7 appcompat support library Toolbar as the app bar, as shown below.
- In the main activity, build a grid layout with images of your own choosing (or use the images in 4_1_P_starter_images.zip). Resize the images so that three of them fit horizontally on the screen in the grid layout.
- Enable each image to provide navigation to another activity.
- When the user taps the image, it starts the other activity.
- From any of the other activities, the user can tap the Up button in the app bar (highlighted in the figure below) to return to the main activity.

Answer these questions
Question 1
Which template provides an activity with an options menu, the Up button, and the v7 appcompat support library Toolbar as the app bar?
Question 2
Why would you use a GridLayout compared to a LinearLayout or a RelativeLayout to provide navigation using images?
Question 3
Where do you put the GridLayout of images? Choose one:
- In activity_main.xml for the MainActivity.
- In content_main.xml for the MainActivity.
- In the "main" XML layout files for each other activity.
- In the "content" XML layout files for each other activity.
Question 4
Where do you define the app's activities and parent activity to provide Up navigation? Choose one:
- To provide the Up button for a child screen activity, declare the child activity's parent in the activity_main.xml file.
- To provide the Up button for a child screen activity, declare the activity's parent in the AndroidManifest.xml file.
- To provide the Up button for a child screen activity, declare the child activity's parent in the "main" XML layout file for the child screen activity.
Question 5
Which technique do you use to launch another activity from a navigation image? Choose one:
- Use the
android:onClickattribute with the ImageView in the XML layout to call a public method in the activity associated with the layout. - Use the following code in a public method (assuming the other activity is called OtherActivity):
Intent intent = new Intent(this, OtherActivity.class); startActivity(intent); - Both of the above.
Submit your app for grading
Guidance for graders
Check that the app has the following features:
- A GridLayout in the content_main.xml file.
- A new
IntentandstartActivity()method for each navigation element in the grid. - A separate activity class for each navigation element in the grid.
4.4: RecyclerView
Build and run an app
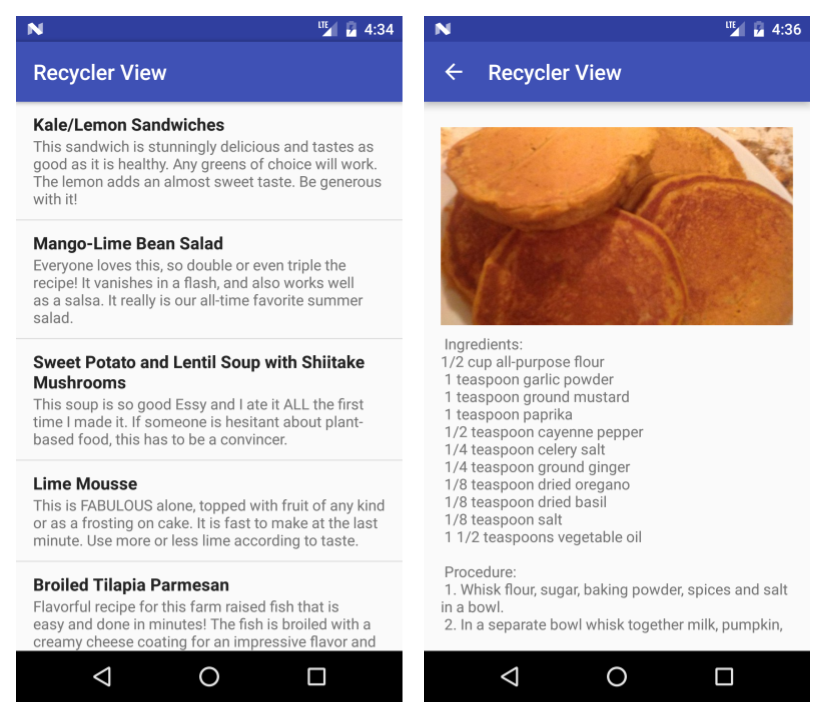
- Create an app that uses a RecyclerView to display a list of recipes.
- Each list item shows the name of the recipe with a short description. Use separate TextView views and styling for the recipe name and description.
- When the user taps a recipe (an item in the list), start an activity that shows the full recipe text.
- You may use placeholder text for the full recipes.
- Optionally, add an image for the finished dish to each recipe.
- Clicking the up button takes the user back to the list of recipes.
The screenshot below shows an example for a simple implementation. Your app can look very different, as long as it has the required functionality.

Answer these questions
Question 1
What are the primary components you need to display the recipes list? Check all that apply.
RecyclerViewRecyclerView.AdapterRecyclerView.ViewHolderAppCompatActivity
Question 2
What class do you need to implement in order to listen and respond to user clicks?
Submit your app for grading
Guidance for graders
Check that the app has the following features:
- Implements a RecyclerView that shows a scrollable list of recipe titles and short descriptions.
- The code extends or implements RecyclerView, RecyclerView.Adapter, RecyclerView.ViewHolder, and View.OnClickListener.
- Clicking on a list item starts an activity that shows the full recipe.
- The manifest file defines a parent relationship so that clicking the Up button in a recipe view goes back to the list of recipes.
- ViewHolder contains a layout with two TextViews; for example, a LinearLayout with two TextViews.
