8.2: Alarm Manager
Contents:
- What you should already KNOW
- What you will LEARN
- What you will DO
- App overview
- Task 1. Set up the Stand Up! project and views
- Task 2. Set up the notification
- Task 3. Create the repeating alarm
- Coding challenge
- Summary
- Related concept
- Learn more
In your previous practicals, you've learned how to make your app respond to user interaction by pushing a button or tapping a notification. You've also learned how to make your app respond to system events using BroadcastReceivers. But what if your app needs to take action at a specific time, such as is the case with a calendar notification? In that case, you would use AlarmManager, a class that allows you to launch and repeat a PendingIntent at a specific time and interval.
In this practical, you will create a timer that will remind you to stand up if you have been sitting for too long.
What you should already KNOW
From previous practicals, you should be able to:
- Implement onCheckChanged listeners for toggle buttons.
- Set up custom broadcast intents.
- Use broadcast receivers.
- Send notifications.
What you will LEARN
You will learn to:
- Schedule repeating alarms with AlarmManager.
- Check if an Alarm is already set up.
- Cancel a repeating alarm.
What you will DO
- Set a repeating alarm to notify you every fifteen minutes.
- Use a ToggleButton to set and keep track of the alarm.
- Use Toast messages to notify the user when the Alarm is turned on or off.
App overview
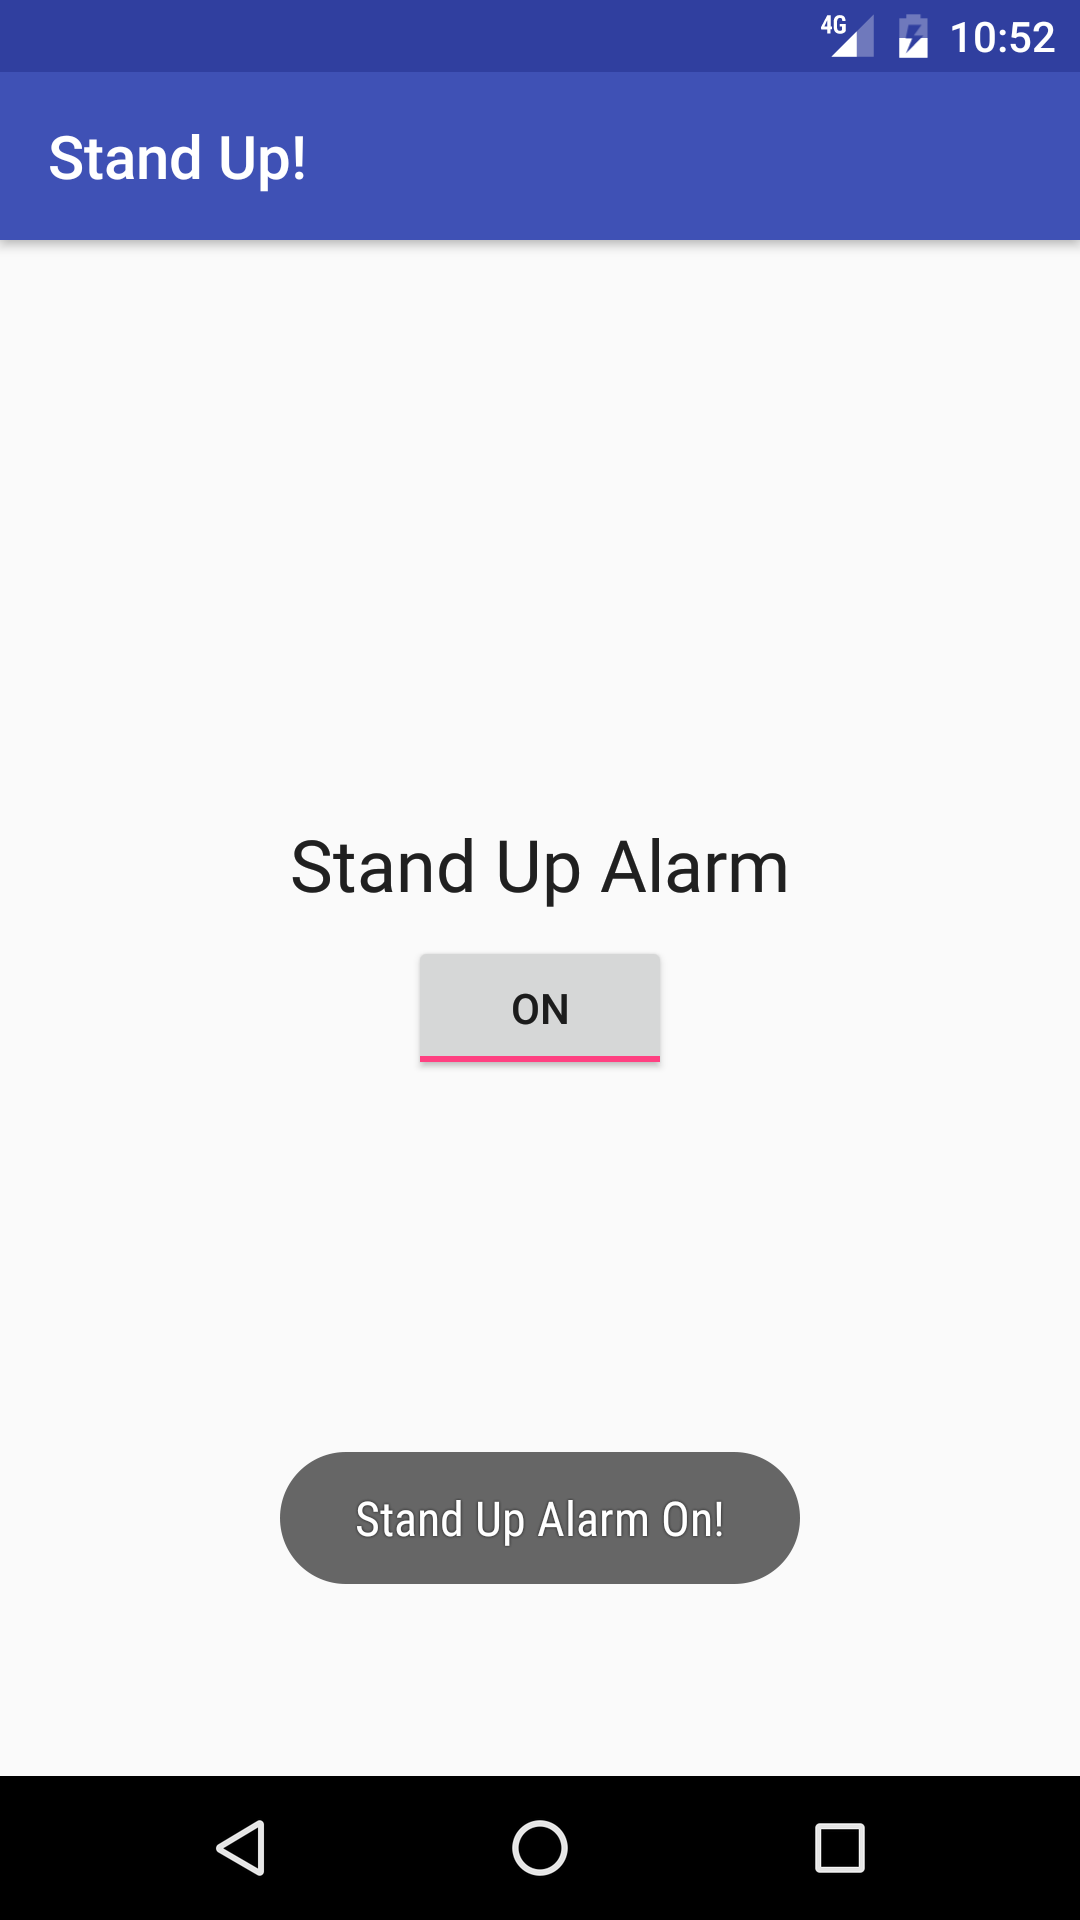
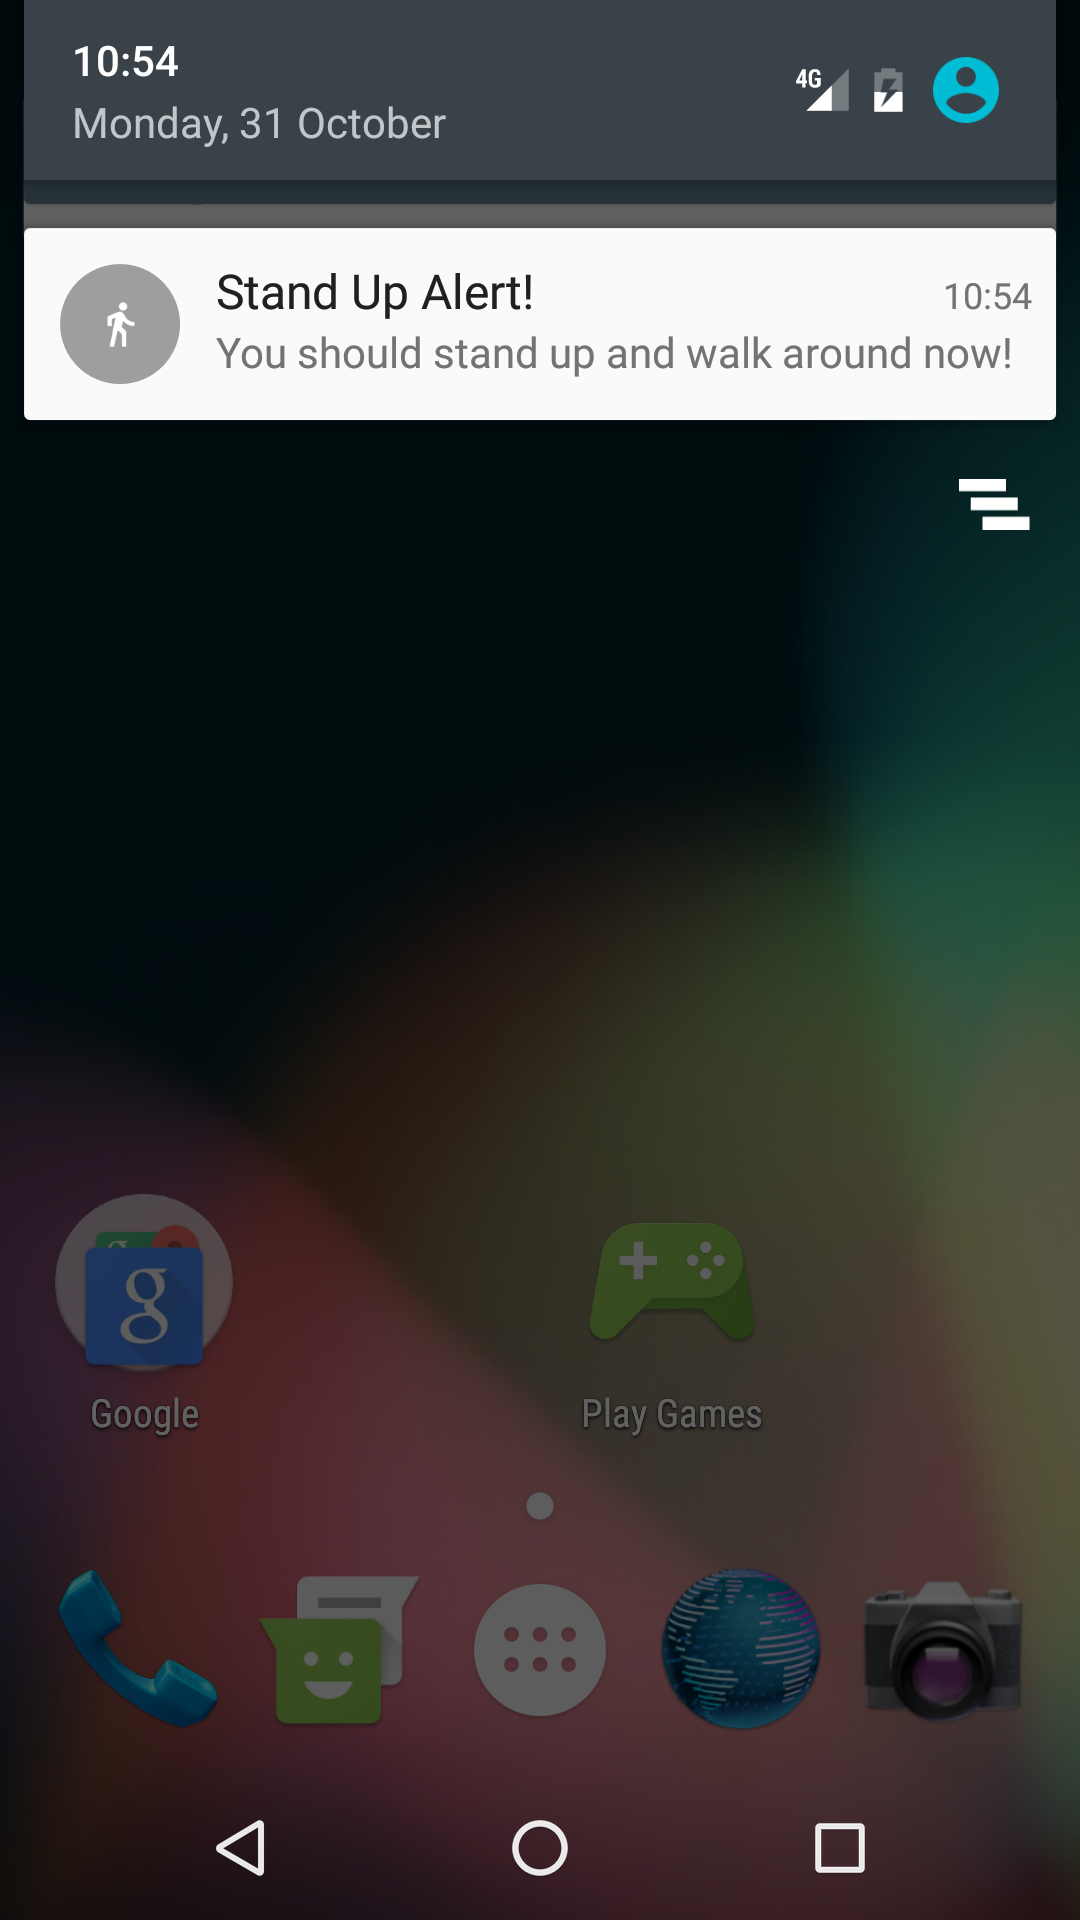
Stand Up! is an app that helps you stay healthy by reminding you to stand up and walk around every fifteen minutes. It uses a notification to let you know when fifteen minutes have passed. The app includes a toggle button that can turn the Alarm on and off.


Task 1. Set up the Stand Up! project and views
1.1 Create the Stand Up! project layout
- Create a new project called "Stand Up!", accept the default options and use the empty activity template.
- Open the activity_main.xml layout file.
- Change the root view to RelativeLayout.
- Remove the entire "Hello World" TextView and add the following elements:
TextView
Attribute
Value
android:layout_width
"wrap_content"
android:layout_height
"wrap_content"
android:layout_above
"@+id/alarmToggle"
android:layout_centerHorizontal
"true"
android:layout_margin
"8dp"
android:text
"Stand Up Alarm"
android:textAppearance
"@style/TextAppearance.AppCompat.Headline"
ToggleButton
Attribute
Value
android:id
"@+id/alarmToggle"
android:layout_width
"wrap_content"
android:layout_height
"wrap_content"
android:layout_centerHorizontal
"true"
android:layout_centerVertical
"true"
1.2 Set up the setOnCheckedChangeListener() method
The Stand Up! app includes a toggle button that is used to set and cancel the alarm, as well as visibly represent the alarm's current status. To set the alarm when the toggle is turned on, you will use the onCheckedChangeListener() method:
- In your MainActivity
onCreate()method, find the Alarm Toggle by id. Call
setOnCheckedChangeListener()on the toggle button instance, and begin typing "new OnCheckedChangeListener". Android Studio will autocomplete the method for you, including the requiredonCheckedChanged()override method. This method has two parameters: the CompoundButton that was clicked (in this case it's the Alarm Toggle button), and a boolean representing the current state of the Toggle Button (i.e., whether the toggle is now set on or off.alarmToggle.setOnCheckedChangeListener( new CompoundButton.OnCheckedChangeListener() { @Override public void onCheckedChanged(CompoundButton compoundButton, boolean isChecked) { } });It is useful for the user to have some feedback other than the toggle button being turned on and off to indicate the alarm was indeed set (you haven't implemented the alarm yet, you will do that in a further section). Set up an if/else block using the boolean parameter in the
onCheckedChanged()method that delivers a toast message to tell the user if the Alarm was turned on or off. Don't forget to extract your string resources.String toastMessage; if(isChecked){ //Set the toast message for the "on" case toastMessage = getString(R.string.alarm_on_toast); } else { //Set the toast message for the "off" case toastMessage = getString(R.string.alarm_off_toast); } //Show a toast to say the alarm is turned on or off Toast.makeText(MainActivity.this, toastMessage, Toast.LENGTH_SHORT) .show();
Task 2. Set up the notification
The next step is to create the notification that will remind the user to stand up every fifteen minutes. For now, the notification will be delivered immediately when the toggle is set.
2.1 Create the notification
In this step, you will create a deliverNotification() method that will post the reminder to stand up and walk around.
- Create a member variable in MainActivity called mNotificationManager of type NotificationManager.
- Initialize it in
onCreate()by callinggetSystemService():mNotificationManager = (NotificationManager) getSystemService(NOTIFICATION_SERVICE); - Create a method in MainActivity called
deliverNotification()that takes the Context as an argument and does not return anything.private void deliverNotification(Context context) {} - Create a member constant in MainActivity called NOTIFICATION_ID and set it to 0. Your app will only have one notification at a time, so you will use the same notification ID for all notifications.Note: Notification ID's are used to distinguish notifications within your application. The NotificationManager will only be able to cancel notifications delivered from your app so you can use the same ID in in different applications.
Notification content Intent
- Create an Intent in
onCreate()that you will use for the notification content Intent:Intent contentIntent = new Intent(context, MainActivity.class); - Create a PendingIntent from content Intent right below the definition of
contentIntentusing thegetActivity()method, passing in the notification ID and using theFLAG_UPDATE_CURRENT flag:PendingIntent contentPendingIntent = PendingIntent.getActivity (context, NOTIFICATION_ID, contentIntent, PendingIntent.FLAG_UPDATE_CURRENT);Note: PendingIntent flags tell the system how to handle the situation when multiple instances of the same PendingIntent are created (meaning they contain the same intent). The FLAG_UPDATE_CURRENT flag tells the system to use the old Intent but replace the extras data. Since you don't have any extras in this Intent, you reuse the same PendingIntent over and over.
Notification title and text
- Create a string resource in your strings.xml file called notification_title. Set it equal to "Stand Up Alert".
- Create a string resource in your strings.xml file called notification_text. Set it equal to "You should stand up and walk around now!".
Notification icon
- Add an image asset to use as the notification icon (use the Image Asset Studio). Choose any icon you find appropriate for this alarm:

Build the notification
- Use the NotificationCompat.Builder to build a notification in the
deliverNotification()method using the above notification title, text, icon and content intent.NotificationCompat.Builder builder = new NotificationCompat.Builder(context) .setSmallIcon(R.drawable.ic_stand_up) .setContentTitle(context.getString(R.string.notification_title)) .setContentText(context.getString(R.string.notification_text)) .setContentIntent(contentPendingIntent) - Set the Notification priority to PRIORITY_HIGH:
.setPriority(NotificationCompat.PRIORITY_HIGH) - Add an option to the builder to set AutoCancel to true, and another option to use the default light, sound and vibration pattern:
.setAutoCancel(true)
.setDefaults(NotificationCompat.DEFAULT_ALL);
Deliver the notification
- Use the NotificationManager to deliver the notification:
mNotificationManager.notify(NOTIFICATION_ID, builder.build()); - Call
deliverNotification()when the alarm toggle button is turned on, passing in the activity context: Call
cancelAll()on the NotificationManager if the toggle is turned off to remove the notification.if(isChecked){ deliverNotification(MainActivity.this); //Set the toast message for the "on" case toastMessage = getString(R.string.alarm_on_toast); } else { //Cancel notification if the alarm is turned off mNotificationManager.cancelAll(); //Set the toast message for the "off" case toastMessage = getString(R.string.alarm_off_toast); }- Run the app, and check that the notification is delivered with all the desired options.
At this point there is no alarm at all: the notification is immediately delivered when the alarm toggle is turned on. In the next section you will implement the AlarmManager to schedule and deliver the notification every 15 minutes.
Task 3. Create the repeating alarm
Now that your app can send a notification it is time to implement the main component of your application: the AlarmManager. This is the class that will be responsible for periodically delivering the reminder to stand up. AlarmManager has many kinds of alarms built into it, both one-time and periodic, exact and inexact. To learn more about the different kinds of alarms, see Scheduling Repeating Alarms.
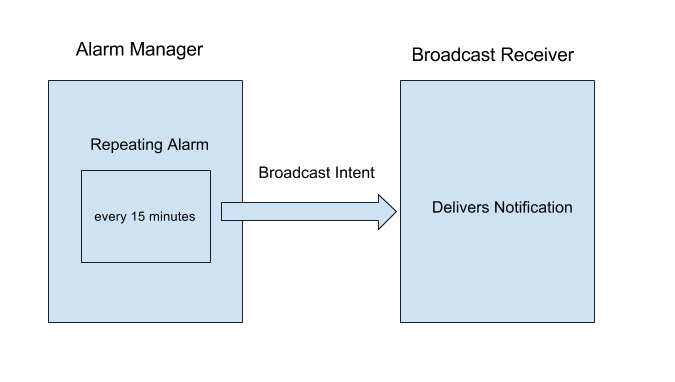
AlarmManager, like notifications, uses a PendingIntent that it delivers with the specified options. Because of this, it can deliver the Intent even when the application is no longer running. In this application, your PendingIntent will deliver an Intent broadcast with a custom "Notify" action.
The broadcast intent will be received by a broadcast receiver that takes the appropriate action (delivers the notification).

The AlarmManager can trigger one-time or recurring events which occur even when the device is in deep sleep or your application is not running. Events may be scheduled with your choice of currentTimeMillis() when using the real time version (RTC) or elapsedRealtime() when using the elapsed time version (ELAPSED_REALTIME), and deliver a PendingIntent when they occur. For more information on the different clocks available and information on how to control the timing of events, see the SystemClock Developer Reference.
3.1 Set up the broadcast pending intent
The AlarmManager is responsible for delivering your PendingIntent at a specified interval. This PendingIntent will deliver a broadcast intent letting the application know it is time to update the remaining time in the notification.
Create a string constant as a member variable in MainActivity to be used as the broadcast intent action which will deliver the notification:
private static final String ACTION_NOTIFY =
    "com.example.android.standup.ACTION_NOTIFY";
Note: use the fully-qualified package name for the Intent string, to ensure that your Broadcast is unique, and can not accidentally be used by other applications with similar actions.Create an Intent called notifyIntent in
onCreate()with the custom string as its action:Intent notifyIntent = new Intent(ACTION_NOTIFY);- Create the notify PendingIntent using the context, the NOTIFICATION_ID variable, the new notify intent, and the PendingIntent flag UPDATE_CURRENT:
PendingIntent notifyPendingIntent = PendingIntent.getBroadcast
   (this, NOTIFICATION_ID, notifyIntent, PendingIntent.FLAG_UPDATE_CURRENT);
3.2 Set the repeating alarm
You will now use the AlarmManager to deliver this broadcast Intent every 15 minutes. For this task, the appropriate type of alarm is an inexact, repeating alarm that uses elapsed time and will wake the device up if it is asleep. The real time clock is not relevant here, since we want to deliver the notification every fifteen minutes.
- Initialize the AlarmManager in
onCreate()by callinggetSystemService():AlarmManager alarmManager = (AlarmManager) getSystemService(ALARM_SERVICE); - In the
onCheckedChanged()method, callsetInexactRepeating()on the alarm manager instance when the user clicks the Alarm "ON" (The second parameter istrue). You will use thesetInexactRepeating()alarm since it is more resource efficient to use inexact timing (the system can bundle alarms from different apps together) and it is acceptable for your alarm to deviate a little bit from the exact 15 minute repeat interval. ThesetInexactRepeating()method takes 4 arguments: - The alarm type. In this case you will use the elapsed time since boot type, since only the relative time is important. You also want to wakeup the device if it's asleep, so the alarm type is ELAPSED_REALTIME_WAKEUP.
- The trigger time in milliseconds. For this, use the current elapsed time, plus 15 minutes. To get the current elapsed time, you can call SystemClock.elapsedRealtime(). You can then use a built-in AlarmManager constant to add 15 minutes to the elapsed time:
AlarmManager.INTERVAL_FIFTEEN_MINUTES. - The time interval in milliseconds. You want the notification posted every 15 minutes. You can use the AlarmManager.INTERVAL_FIFTEEN_MINUTES constant again.
The PendingIntent to be delivered. You created the PendingIntent in the previous task.
long triggerTime = SystemClock.elapsedRealtime()
       + AlarmManager.INTERVAL_FIFTEEN_MINUTES;

long repeatInterval = AlarmManager.INTERVAL_FIFTEEN_MINUTES;

//If the Toggle is turned on, set the repeating alarm with a 15 minute interval
alarmManager.setInexactRepeating(AlarmManager.ELAPSED_REALTIME_WAKEUP,
       triggerTime, repeatInterval, notifyPendingIntent);
Note: Because you are accessing the AlarmManager and notifyPendingIntent instances from an anonymous inner class, Android Studio may make these instances final. If it doesn't, you have to make them final yourself.Remove the call to
deliverNotification()in theonCheckedChanged()method.- If the alarm toggle is turned off (by clicking the toggle in the ON state), cancel the alarm by calling
cancel()on the AlarmManager, passing in the pending intent used to create the alarm.
Keep the call to cancelAll() on the NotificationManager, since turning the toggle off should still remove any existing notification.alarmManager.cancel(notifyPendingIntent);
The AlarmManager will now start delivering your Broadcast Intent starting fifteen minutes from when the Alarm was set, and every fifteen minutes after that. Your application needs to be able to respond to these intents by delivering the notification. In the next step you will subclass a BroadcastReceiver to receive the broadcast intents and deliver the notification.
3.3 Create the Broadcast Receiver
The Broadcast Receiver is responsible for receiving the broadcast intents from the AlarmManager and reacting appropriately.
- In Android Studio, click on File > New > Other > Broadcast Receiver.
- Enter AlarmReceiver for the name, make sure the Exported checkbox is unchecked (to ensure that other apps will not be able to invoke this Broadcast Receiver). You can also change this setting in the AndroidManifest by setting the
android:exportedattribute tofalse. Android Studio will create the subclass of BroadcastReceiver with the required method (onReceive()), as well as add the receiver to your AndroidManifest. You need to add an Intent Filter to your the<receiver>tag in the AndroidManifest to select the proper incoming Broadcast Intents. - In the Android Manifest, create an
<intent-filter>opening and closing tag between the<receiver>tags. Create an<action>item in the intent filter withandroid:nameattribute set to the custom ACTION_NOTIFY action string you created:<intent-filter> <action android:name="com.example.android.standup.ACTION_NOTIFY" /> </intent-filter> - Cut and paste the
deliverNotification()method to theonReceive()method in the BroadcastReceiver and call it fromonReceive(). The notification manager and notification ID has not been initialized in the BroadcastReceiver class so it will be highlighted in red. - Copy the NOTIFICATION_ID variable from the MainActivity into the BroadcastReceiver class.
- Initialize the NotificationManager at the beginning of the
onReceive()method. You have to call getSystemService() from the passed in Context:NotificationManager notificationManager = (NotificationManager) context.getSystemService(Context.NOTIFICATION_SERVICE); - Remove the line that raises the UnsupportedOperationException.
- Run your app. If you don't want to wait for fifteen minutes to see the notification, you can change the trigger time to
SystemClock.elapsedRealtime()to see the notification immediately. You can also change the interval to a shorter time to make sure that the repeated alarm is working.
You now have an app that can schedule and perform a repeated operation, even if the application is no longer running. Go ahead, exit the application completely, the notification will still be delivered. There is one final component missing that would ensure a proper user experience: if the application is exited, the toggle button will reset to the off state, even if the alarm has already been set. To fix this, you will need to check the state of the alarm every time the application is launched.
3.5 Check the state of the alarm
To track the state of the alarm, you will need a boolean variable that is true if the Alarm already exists, and false otherwise. To set this boolean, you can call PendingIntent.getBroadcast() with the FLAG_NO_CREATE PendingIntent flag. In this case, the PendingIntent is returned if it already exists, otherwise the call returns null. This is extremely useful for checking whether the alarm has already been set.
The PendingIntent flag determines what happens when a PendingIntent whose Intent matches the one you are trying to create already exists. In the case of the NO_CREATE flag, it will return null unless a PendingIntent with a matching Intent already exists.
- Create a boolean that is true if PendingIntent is not null, and false otherwise, using this strategy. Use this boolean to correctly set the state of the ToggleButton when your app starts. This code has to come before the PendingIntent has been created, otherwise it will always return true:
boolean alarmUp = (PendingIntent.getBroadcast(this, NOTIFICATION_ID, notifyIntent, PendingIntent.FLAG_NO_CREATE) != null); - Set the checked state of the toggle right after you define the alarmUp boolean:
This ensures that the toggle will always be turned on if the Alarm is set, and off otherwise. That's it, You now have a repeated scheduled alarm to remind you to stand up every fifteen minutes.alarmToggle.setChecked(alarmUp); - Run your app. Switch on the alarm. Exit the app. Open the app again. The alarm button will show that the alarm is on.
Solution code
**Android Studio project: StandUp
Coding challenge
The AlarmManager class also handles alarm clocks in the usual sense, the kind that wake you up in the morning. On devices running API 21+, you can get information about the next alarm clock of this kind by calling getNextAlarmClock() on the alarm manager.
Add a button to your application that displays the time of next alarm clock that the user has set in a Toast message.
Summary
- AlarmManager allows you to schedule tasks based on the real time clock or the elapsed time since boot.
- AlarmManager provides a variety of alarm types, both periodic and one time, with options to wake up your device if it is asleep.
- AlarmManager is meant for situations where precise timing is critical (such as a calendar event). Otherwise, consider the Job Scheduler framework for more resource-efficient timing and scheduling.
- Use the inexact timing version of the AlarmManager whenever possible, to minimize the load caused by multiple users' devices or multiple applications performing a task at the exact same time.
- AlarmManager uses PendingIntents to perform the operations, so you can schedule broadcasts, services and activities using the appropriate PendingIntent.
Related concept
The related concept documentation is in Android Developer Fundamentals: Concepts.
Learn more
Android developer documentation:
Other resources:
