9.1: Google Maps API
Contents:
- Introduction
- GoogleMap objects
- Map types
- Configuring the initial map state
- Businesses and other points of interest
- Lite mode
- Map styles
- Camera and view
- Controls and gestures
- Indoor maps
- The My Location layer
- Map markers
- Info windows
- Shapes
- Ground overlays
- Tile overlays
- Listening to map events
- Street View
- Related practical
- Learn more
The Google Maps API for Android lets you include a Google Map in your app. You can customize the look and feel of the map, as well as the map's behavior. For example, you can change the color of certain features to highlight them, limit the area a user can scroll in, display the user's location in real time, and much more.
To use the Google Maps API, you must register your app in the Google API Console and obtain an API key.
GoogleMap objects
A Google Map is represented by a GoogleMap object, plus a MapFragment object or a MapView object. The GoogleMap object allows you to programmatically interact with the map. The MapFragment and MapView objects represent the Android view components into which the map is loaded.
The GoogleMap object handles the following operations for you:
- Connecting to the Google Maps service.
- Downloading map imagery.
- Displaying the map on the device screen.
- Displaying controls such as pan and zoom.
- Responding to pan and zoom gestures.
You can control the behavior of maps with objects and methods of the API. For example, GoogleMap has callback methods that respond to keystrokes and touch gestures on the map. You can set marker icons on your map and add overlays to the map, using objects you provide to GoogleMap.
Google Maps are loaded as a set of map "tiles," which are square pieces of imagery tied to geographic coordinates.
The MapFragment class
MapFragment, a subclass of the Android Fragment class, allows you to place a map in an Android fragment. The MapFragment object acts as a container for the map and provides access to the GoogleMap object.
The MapView class
MapView, a subclass of the View class, allows you to place a map in a view instead of placing the map in a fragment. The MapView object acts as a container for the map and provides access to the GoogleMap object.
Your code must override the following lifecycle methods for the activity:
onCreate()onStart()onResume()onPause()onStop()onDestroy()onSaveInstanceState()onLowMemory()
The overridden methods should call the corresponding lifecycle methods of MapView. For example, you would override and forward the onResume() method of the activity as follows:
@Override
protected void onResume() {
    super.onResume();
    mMapView.onResume();
}
Create the Google Map
To create a GoogleMap instance, you must do the following:
- Make your activity implement the
OnMapReadyCallbackinterface and override the requiredonMapReady()method. - Get a reference to the container (either a
MapFragmentor aMapView) and callgetMapAsync()on it.
After the map is ready, the onMapReady() callback is triggered with a passed-in GoogleMap object, which you can then save in a member variable. This callback is where all map operations occur.
Map types
The Google Maps Android API offers five types of maps:
- Normal : Typical road map. Shows roads, some features built by humans, and important natural features such as rivers. Road and feature labels are also visible.
- Hybrid : Satellite photograph data with road maps added. Road and feature labels are also visible.
- Satellite : Satellite photograph data. Road and feature labels are not visible.
- Terrain : Topographic data. The map includes colors, contour lines and labels, and perspective shading. Some roads and labels are also visible.
- None : No tiles. The map is rendered as an empty grid with no tiles loaded.
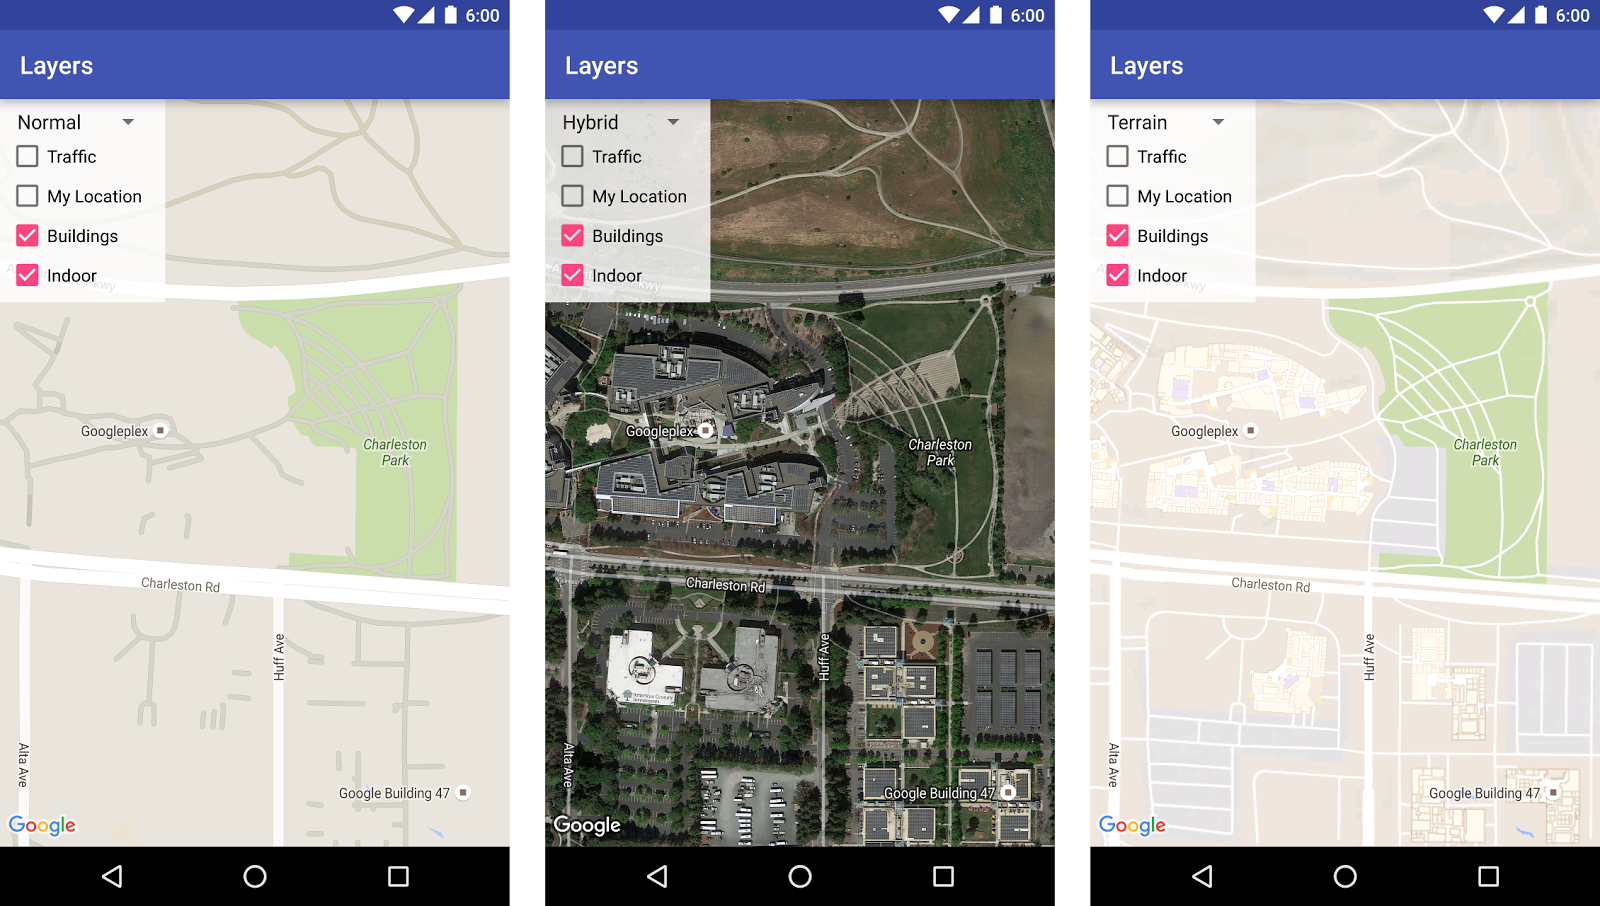
To set the type of a map, call the GoogleMap object's setMapType() method. Pass in one of the type constants defined in GoogleMap. For example, here's how to display a hybrid map:
GoogleMap map;
// Sets the map type to be "hybrid"
mMap.setMapType(GoogleMap.MAP_TYPE_HYBRID);
Configuring the initial map state
The Maps API allows you to configure the initial state of the map. You can specify the following:
- The camera position, including location, zoom, bearing, and tilt. See the Camera and view section below.
- The map type.
- Whether the zoom buttons or compass appear on the screen.
- The gestures a user can use to manipulate the map.
- Whether lite mode is enabled or not.
If you add the map to your activity's layout file, you use XML to configure the map's initial state. If you add the map in your activity, you configure the map's initial state programmatically.
Defining the initial state in XML
The Maps API defines a set of custom XML attributes for a MapFragment or a MapView object:
mapType: Specify the type of map to display. Valid values includenone,normal,hybrid,satellite, andterrain.cameraTargetLat,cameraTargetLng,cameraZoom,cameraBearing,cameraTilt: Specify the initial camera position. See Camera and View for more details on camera position and properties.uiZoomControls,uiCompass: Specify whether you want the zoom controls and compass to appear on the map. SeeUiSettingsfor more details.uiZoomGestures,uiScrollGestures,uiRotateGestures,uiTiltGestures: Specify which gestures are enabled or disabled for the user's interaction with the map. SeeUiSettingsfor more details.zOrderOnTop: UserzOrderOnTopif you want the map to cover everything, including controls and other child views of theMapView. SeeSurfaceView.setZOrderOnTop(boolean)for more details.useViewLifecycle: Specifies whether the lifecycle of the map should be tied to the fragment's view, or tied to the fragment itself. Only valid with aMapFragment. See theMapFragmentreference for more details on why you would useuseViewLifeCycle.liteMode: A lite-mode map is a bitmap image of a map that supports a subset of the functionality supplied by the full API. The default value of this attribute isfalse.
To use these custom attributes within your XML layout file, add the following namespace declaration to the fragment or view:
xmlns:map="http://schemas.android.com/apk/res-auto"
The following XML code shows how to configure a MapFragment. These same attributes can be applied to a MapView.
<fragment xmlns:android="http://schemas.android.com/apk/res/android"
  xmlns:map="http://schemas.android.com/apk/res-auto"
  android:name="com.google.android.gms.maps.SupportMapFragment"
  android:id="@+id/map"
  android:layout_width="match_parent"
  android:layout_height="match_parent"
  map:cameraBearing="112.5"
  map:cameraTargetLat="-33.796923"
  map:cameraTargetLng="150.922433"
  map:cameraTilt="30"
  map:cameraZoom="13"
  map:mapType="normal"
  map:uiCompass="false"
  map:uiRotateGestures="true"
  map:uiScrollGestures="false"
  map:uiTiltGestures="true"
  map:uiZoomControls="false"
  map:uiZoomGestures="true"/>
Define the initial state programmatically
If you plan to add, remove, or replace fragments or views programmatically, create them in your activity as follows:
- If you are using a
MapFragment, use theMapFragment.newInstance(GoogleMapOptions options)static factory method to construct the fragment. - If you are using a
MapView, use theMapView(Context, GoogleMapOptions) constructor.
To configure the initial state of the fragment or view, pass in a GoogleMapOptions object that specifies your options. The options available to you are the same as the options available via XML. Create a GoogleMapOptions object like this:
GoogleMapOptions options = new GoogleMapOptions();
And then configure the object as follows:
options.mapType(GoogleMap.MAP_TYPE_SATELLITE)
    .compassEnabled(false)
    .rotateGesturesEnabled(false)
    .tiltGesturesEnabled(false);
Businesses and other points of interest
By default, points of interest (POIs) appear on the base map along with their corresponding icons. POIs include parks, schools, government buildings, and more. Business POIs represent businesses such as shops, restaurants, or hotels. When the map type is normal, business POIs appear on the map in addition to regular POIs.
A POI corresponds to a place, as defined in the Google Places API. For example, recreational parks are POIs, but things like water fountains are usually not POIs unless they're of national or historic significance.
POIs appear on the map by default, but there is no default on-click UI. That is, the API does not automatically display an info window or any other user interface when the user taps a POI.
If you want to respond to a user tapping on a POI, use an OnPoiClickListener as shown in the following code sample:
public class OnPoiClickDemoActivity extends FragmentActivity
    implements OnMapReadyCallback, GoogleMap.OnPoiClickListener {

    @Override
    protected void onCreate(Bundle savedInstanceState) {
        super.onCreate(savedInstanceState);
        setContentView(R.layout.poi_click_demo);

        SupportMapFragment mapFragment = (SupportMapFragment)
                getSupportFragmentManager().findFragmentById(R.id.map);
        mapFragment.getMapAsync(this);
    }

    @Override
    public void onMapReady(GoogleMap map) {
        map.setOnPoiClickListener(this);
    }

    @Override
    public void onPoiClick(PointOfInterest poi) {
        Toast.makeText(getApplicationContext(), "Clicked: " +
                        poi.name + "\nPlace ID:" + poi.placeId +
                        "\nLatitude:" + poi.latLng.latitude +
                        " Longitude:" + poi.latLng.longitude,
                Toast.LENGTH_SHORT).show();
    }
}
As the above sample shows, you set the OnPoiClickListener on the map by calling GoogleMap.setOnPoiClickListener(OnPoiClickListener). When a user taps on a POI, your app receives an onPoiClick(PointOfInterest) event indicating the point of interest (POI) that the user tapped.
The PointOfInterest object contains the latitude/longitude coordinates, place ID, and name of the POI.
Lite mode
A lite-mode map supports all the map types (normal, hybrid, satellite, terrain) and a subset of the functionality supplied by the full API. Lite mode is useful when you want to provide several maps in a list, or a map that is too small to support meaningful interaction.
Users can't zoom or pan a lite-mode map. In a lite-mode map, icons let users access the full Google Maps mobile app and request directions.
Set a GoogleMap to lite mode in XML:
map:liteMode="true"
Or in the GoogleMapOptions object:
GoogleMapOptions options = new GoogleMapOptions().liteMode(true);
Map styles
You can customize the presentation of the standard Google Map styles, changing the visual display of features like roads, parks, businesses, and other points of interest. This means that you can emphasize particular components of the map or make the map look good with your app.
Styling works only on the normal map type. Styling does not affect indoor maps.
To style your map, use a JSON file generated by the Google Maps APIs Styling Wizard. In addition to changing the appearance of features, you can also hide features completely.
[
  {
    "featureType": "all",
    "stylers": [
      { "color": "#C0C0C0" }
    ]
  },{
    "featureType": "road.arterial",
    "elementType": "geometry",
    "stylers": [
      { "color": "#CCFFFF" }
    ]
  },{
    "featureType": "landscape",
    "elementType": "labels",
    "stylers": [
      { "visibility": "off" }
    ]
  }
]
Styled maps use two concepts to apply colors and other style changes to a map:
- Selectors specify the geographic components that you can style on the map. These geographic components include roads, parks, bodies of water, and more, as well as their labels. The selectors include features and elements, specified as
featureTypeandelementTypeproperties. - Stylers are color and visibility properties that you can apply to map elements. They define the displayed color through a combination of hue, color, and lightness/gamma values.
See the style reference for a detailed description of the JSON styling options.
To style your map, first save the JSON file in your raw resource directory (raw/res), which is used to store arbitrary files. Then call GoogleMap.setMapStyle(). Pass in a MapStyleOptions object that loads your resource from the raw directory:
try {
   // Customize the styling of the base map using a JSON object defined
   // in a raw resource file.
   boolean success = googleMap.setMapStyle(
           MapStyleOptions.loadRawResourceStyle(
                   this, R.raw.map_style));

   if (!success) {
       Log.e(TAG, "Style parsing failed.");
   }
} catch (Resources.NotFoundException e) {
   Log.e(TAG, "Can't find style file. Error: ", e);
}
Camera and view
Like Google Maps on the web, the Google Maps Android API uses a Mercator projection to represent the world's curved surface on your device's flat screen. In the east and west directions, the map repeats infinitely as the Earth seamlessly wraps around on itself. In the north and south directions, the map is limited to approximately 85 degrees north and 85 degrees south. You can see parts of Antarctica, but not the North and South Poles.
The Google Maps Android API allows you to change the user's view of the map by modifying the map's camera. Changes to the camera don't change markers, overlays, or graphics that you add.
Because you can listen for user gestures on the map, you can change the map in response to user requests. For example, the callback method OnMapClickListener.onMapClick() responds to a single tap on the map. The method receives the latitude and longitude of the tap location, which you can use to pan or zoom the camera to that point. Similar methods are available for responding to taps on a marker's bubble or for responding to a drag gesture on a marker.
The camera position
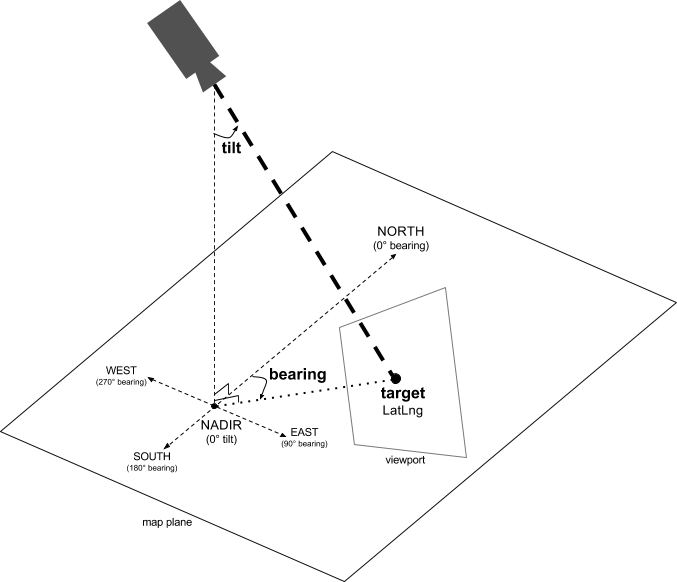
The map view is modeled as a camera looking down on a flat plane. The following properties specifiy the camera's position (and hence the rendering of the map): target (latitude/longitude location), bearing, tilt, and zoom.
Target (location)
The camera target is the location of the center of the map, specified as latitude and longitude.
Bearing (orientation)
The camera bearing is the direction in which a vertical line on the map points, measured in degrees clockwise from north. Someone driving a car often turns a road map to align it with their direction of travel, while hikers using a map and compass usually orient the map so that a vertical line points north. The Maps API lets you change a map's alignment or bearing. For example, a bearing of 90 degrees results in a map where the upwards direction points due east.
Tilt (viewing angle)
By default, the camera points down onto the map and no perspective is applied. You can tilt the camera to change the viewing angle, which allows the map to appear in perspective, where more distant features appear smaller.
Zoom
The zoom level of the camera determines the scale of the map. At higher zoom levels more detail can be seen on the screen, while at lower zoom levels more of the world can be seen on the screen.
At zoom level 0, the scale of the map is such that the entire world has a width of approximately 256 dp (density-independent pixels).
Increasing the zoom level by 1 doubles the width of the world on the screen. Hence at zoom level N , the width of the world is approximately 256 * 2 N dp. That is, at zoom level 2, the whole world is approximately 1024 dp wide.
The zoom level doesn't need to be an integer. The range of zoom levels that the map permits depends on factors including location, map type, and screen size. The following list shows the approximate level of detail you can expect to see at each zoom level:
1: World5: Landmass/continent10: City15: Streets20: Buildings
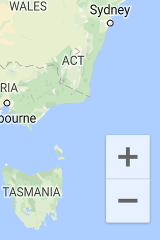
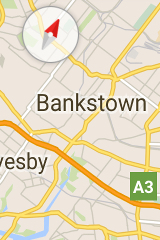
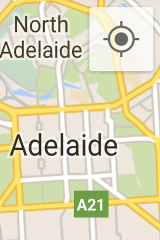
The following images show different zoom levels:
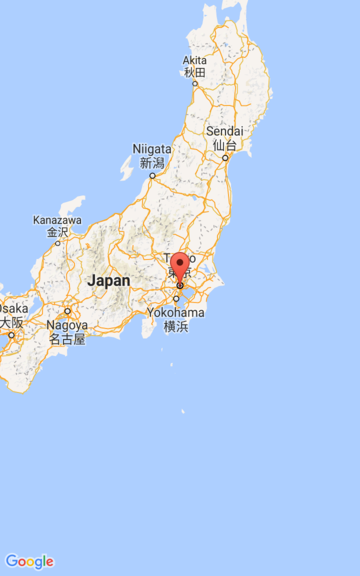 A map at zoom level 5.
|
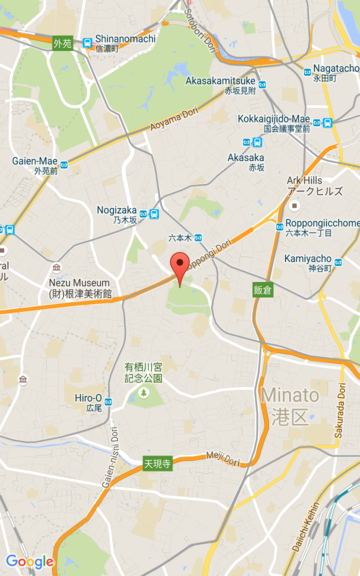 A map at zoom level 15.
|
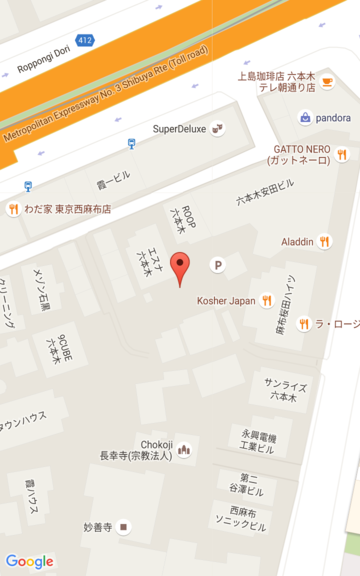 A map at zoom level 20.
|
Controls and gestures
Using the Google Maps Android API, you can customize how users can interact with your map, by specifying which of the built-in UI components appear on the map and which gestures are allowed.
UI controls
The Maps API offers UI controls that are similar to the UI controls in the Google Maps app on your Android phone. To toggle the visibility of these controls, use the UiSettings class. To obtain a UiSettings object from a GoogleMap, use the GoogleMap.getUiSettings() method. Changes made in the UiSettings class are immediately reflected on the map. For example, you may want to disable the compass icon that allows the users to toggle their bearing.
Zoom controls
The Maps API provides zoom controls that appear in the bottom-right corner of the map. These controls are disabled by default. To enable the controls, call UiSettings.setZoomControlsEnabled(true).
Compass
The Maps API provides a compass graphic that sometimes appears in the top-left corner of the map. The compass only appears when the camera is oriented such that it has a non-zero bearing or non-zero tilt. The user can tap the compass to reset the camera's tilt and bearing to vertical and north-facing.
To disable the compass graphic from appearing altogether, call UiSettings.setCompassEnabled(boolean). However, you can't force the compass to always be shown.
My Location button
The My Location button appears in the top-right corner of the screen only when the My Location layer is enabled. The My Location layer is covered later in this lesson.
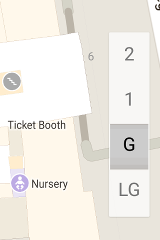
Level picker
When the user views an indoor map, a level picker (floor picker) appears by default near the center-right edge of the screen. When two or more indoor maps are visible, the level picker applies to the building that's currently in focus, which is typically the building nearest the center of the screen. Each building starts out showing a default floor level, which is set when the building is added to Google Maps. Users can choose a different level by selecting it from the picker.
To disable or enable the level-picker control, call GoogleMap.getUiSettings().setIndoorLevelPickerEnabled(boolean).
This is useful if you want to replace the default level picker with your own level picker, for example to create an augmented-reality scavenger hunt in your home.
Map toolbar
By default, a toolbar appears at the bottom-right of the map when a user taps a marker. The toolbar gives the user quick access to the Google Maps mobile app.
In a lite-mode map, the toolbar persists independently of the user's actions. In a fully interactive map, the toolbar slides in when the user taps a marker and slides out again when the marker is no longer in focus.
The toolbar icons provide access to a map view or a direction-request in the Google Maps mobile app. When a user taps an icon on the toolbar, the API builds an intent to launch the corresponding activity in the Google Maps mobile app.
To enable and disable the toolbar, call UiSettings.setMapToolbarEnabled(boolean).
The toolbar is visible on the right side of the above screenshot. Depending on the content of the map, zero, one, or both of the intent icons appear on the map (if the Google Maps mobile app supports the intents).
Zoom gestures
The map responds to a variety of gestures that change the zoom level of the camera:
- Double-tap to increase the zoom level by 1 (zoom in).
- Two-finger tap to decrease the zoom level by 1 (zoom out).
- Two-finger pinch to zoom out, or two-finger stretch to zoom in.
- One-finger zoom: Double-tap but don't release on the second tap. Then slide the finger up to zoom out, or slide the finger down to zoom in.
To disable zoom gestures, call UiSettings.setZoomGesturesEnabled(boolean). If zoom gestures are disabled, a user can still use the zoom controls to zoom in and out.
Scroll (pan) gestures
A user can scroll (pan) around the map by dragging the map with their finger. To disable scrolling, call UiSettings.setScrollGesturesEnabled(boolean). For example, you may want to limit the map to one specific area of interest.
Tilt gestures
A user can tilt the map by placing two fingers on the map and moving them down or up together to increase or decrease the tilt angle respectively. To disable tilt gestures, call UiSettings.setTiltGesturesEnabled(boolean).
Rotate gestures
A user can rotate the map by placing two fingers on the map and applying a rotate motion. To disable rotation, call UiSettings.setRotateGesturesEnabled(boolean).
Indoor maps
At high zoom levels, the map shows floor plans for indoor spaces such as airports, shopping malls, large retail stores, and transit stations. These floor plans, called indoor maps, are displayed for the normal and satellite map types (GoogleMap.MAP_TYPE_NORMAL and GoogleMap.MAP_TYPE_SATELLITE). Floor plans are automatically enabled when the user zooms in, and they fade away when the map is zoomed out.
Here's a summary of the indoor maps functionality in the API:
- To disable indoor maps, call
setIndoorEnabled(false)on theGoogleMapobject. By default, indoor maps are enabled. - To disable the level-picker control that appears when you zoom in on a building, call
getUiSettings().setIndoorLevelPickerEnabled(false). - To set a listener that's called when the state of an indoor map changes, use the
OnIndoorStateChangeListenerinterface. The state changes when a new building comes into focus (meaning that a new building is in the center of the screen and zoomed in). The state also changes when a user uses the level-picker control to switch to a new level in a building. - To show the building that's in focus, use
GoogleMap.getFocusedBuilding(). You can then find the currently active level by callingIndoorBuilding.getActiveLevelIndex(). Refer to the reference documentation to see all the information available in theIndoorBuildingandIndoorLevelobjects.
Styling of the base map does not affect indoor maps.
Indoor maps (floor plans) are available in select locations. If floor-plan data is not available for a building that you would like to highlight in your app, you can:
- Add floor plans to Google Maps so that your floor plans are available to all users of Google Maps.
- Display a floor plan as a ground overlay or tile overlay on your map so that only users of your app can view your floor plans.
The My Location layer
You can use the My Location layer and the My Location button to show your user their current position on the map.
Manifest.permission.ACCESS_FINE_LOCATION
or Manifest.permission.ACCESS_COARSE_LOCATION, depending on your required precision.
After the onMapReady() callback is triggered, enable the My Location layer on the map:
mMap.setMyLocationEnabled(true);
When the My Location layer is enabled, the My Location button appears in the top-right corner of the map. When a user taps the button, the camera centers the map on the current location of the device, if the location is known. The location is indicated on the map by a small blue dot if the device is stationary, or as a chevron if the device is moving.

A tap on the My Location button also triggers the GoogleMap.OnMyLocationButtonClickListener, which you can override.
To prevent the My Location button from appearing altogether, call UiSettings.setMyLocationButtonEnabled(false).
Map markers
Markers identify locations on the map. The default marker uses the standard Google Maps icon:
 .
.
You can use the API to change the icon's color, image, or anchor point. Markers are objects of type Marker, and you add them to the map using the GoogleMap.addMarker(markerOptions) method.
Markers are designed to be interactive. They receive click-events by default, and are often used with event listeners to bring up info windows. Setting a marker's draggable property to true allows the user to change the position of the marker. (Touch & hold the marker to make it movable.)
By default, when a user taps a marker, the map toolbar appears at the bottom-right of the map, giving the user quick access to the Google Maps mobile app.
For more information on adding and customizing markers see Markers.
Info windows
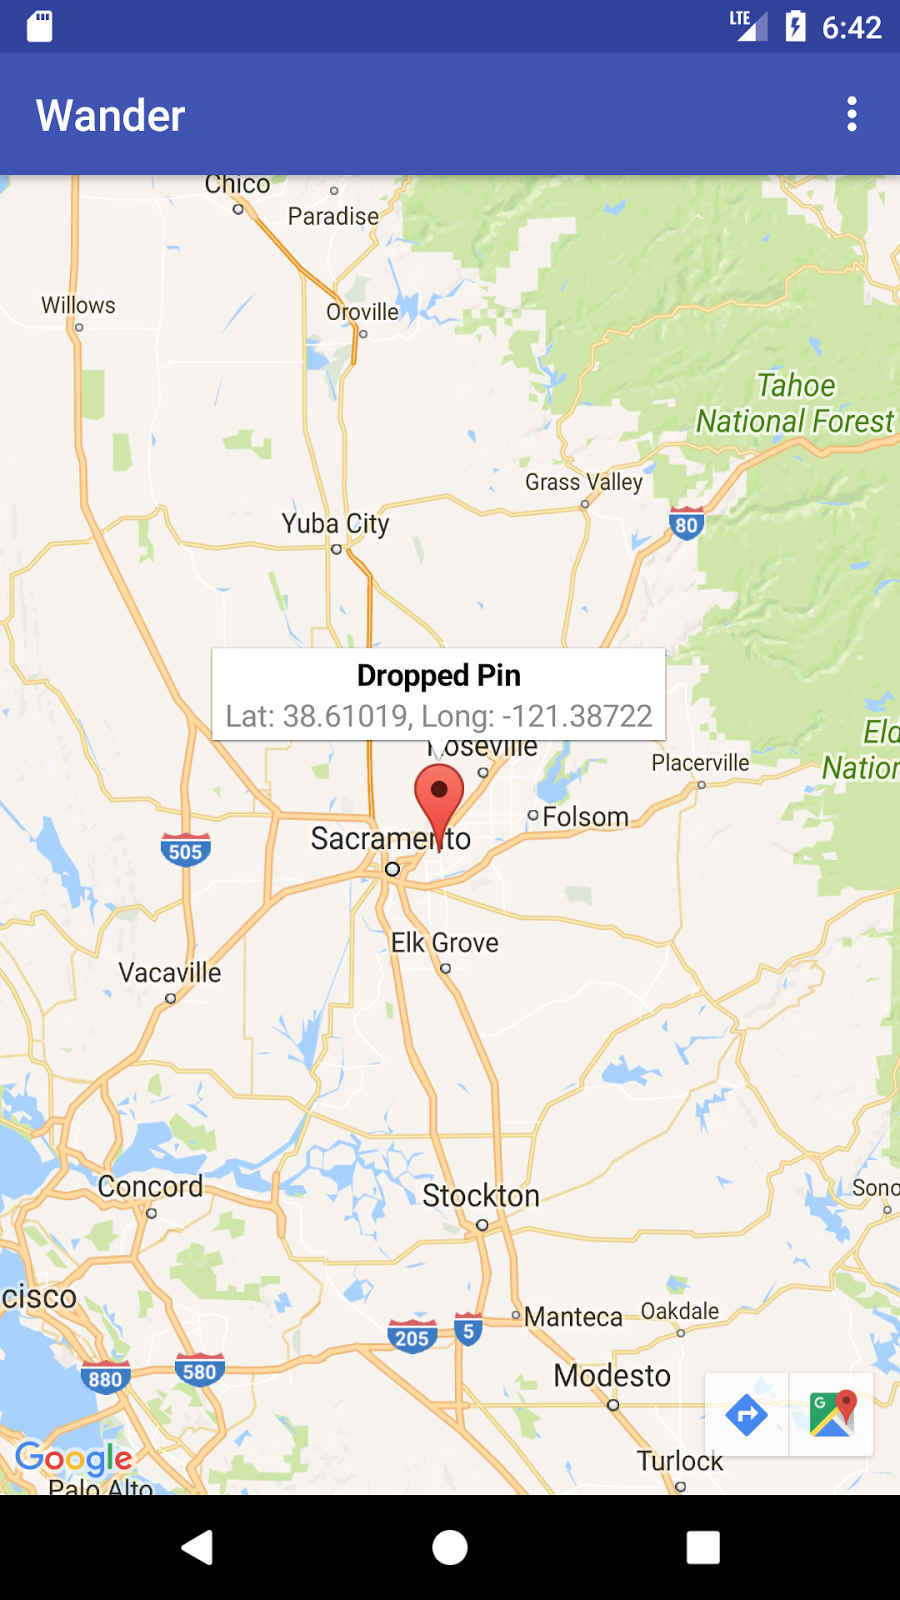
An info window displays text or images in a pop-up window that overlays the map. Info windows are always anchored to a marker. Their default behavior is to open when the marker is tapped. Only one info window is displayed at a time.
The default info window contains the title in bold, with the (optional) snippet text below the title.
To customize the content and design of info windows:
- Create a concrete implementation of the
InfoWindowAdapterinterface, which is described below. - Call
GoogleMap.setInfoWindowAdapter()with yourInfoWindowAdapterimplementation.
The InfoWindowAdapter interface contains two methods for you to implement:
- The
getInfoWindow(Marker)method lets you provide a view that's used for the entire info window. - The
getInfoContents(Marker)method lets you customize the info-window content, while keeping the default frame and background.
The API first calls getInfoWindow(Marker). If the method returns null, the API calls getInfoContents(Marker). If this method also returns null, the API uses the default info window.
Shapes
The Google Maps API for Android offers ways for you to draw shapes over your maps to customize them for your app.
- A polyline is a series of connected line segments that can form any shape you want. You can use polylines to mark paths and routes on the map.
- A polygon is an enclosed shape that can be used to mark areas on the map.
- A circle is a geographically accurate projection of a circle on the Earth's surface drawn on the map.
You can customize a shape's appearance by altering properties. For more information, see Shapes.
Ground overlays
A ground overlay is an image that is fixed on the map at a given point. Unlike markers, ground overlays are oriented against the Earth's surface rather than against the screen. Rotating, tilting, or zooming the map changes the orientation of the image. Ground overlays are useful for adding single images. If you want to add extensive imagery that covers a large portion of the map, use a tile overlay, as described below.
For more information, see Ground Overlays.
Tile overlays
A Google Map is split up into square tiles that are loaded as they are needed. The scale of the map loaded into each tile depends on the zoom level. A TileOverlay object defines a set of images that are added on top of the base map tiles.
Provide the tiles for each zoom level that you want to support. If you have enough tiles at multiple zoom levels, you can supplement Google's map data for the entire map.
Tile overlays are useful when you want to add extensive imagery to the map, typically covering large geographical areas. In contrast, ground overlays are useful when you wish to fix a single image at one area on the map.
You can use transparent tile overlays to add extra features to the map. To make tile overlays transparent, set a transparency factor on the tile overlay programmatically or provide transparent tile images.
For more information, see Tile Overlays.
Listening to map events
Using the Google Maps Android API, you can listen to events on the map. The API includes support for the following types of map events:
- Click-events, touch & hold events
- Camera-change events
- Point of interest (POI) events, business POI events
- Indoor-map events
- Marker events, info-window events
- Shape events, overlay events
For more information on reacting to these events in your app, see Events.
Street View
Google Street View provides panoramic 360-degree views from designated roads throughout its coverage area.
The StreetViewPanorama class models the Street View panorama in your app. Within your UI, a panorama is represented by a StreetViewPanoramaFragment object or StreetViewPanoramaView object.
Each Street View panorama is an image, or set of images, that provides a full 360-degree view from a single location. Images conform to the equirectangular (or "plate carrée") projection, which contains 360 degrees of horizontal view (a full wrap-around) and 180 degrees of vertical view (from straight up to straight down). The resulting 360-degree panorama defines a projection on a sphere with the image wrapped to the two-dimensional surface of that sphere.
The coverage available through the Google Maps Android API v2 is the same as the coverage available for the Google Maps app on your Android device. For an interactive map that shows areas that Street View supports, see About Street View.
Unlike with a map, it's not possible to configure the initial state of the Street View panorama via XML. However, you can configure the panorama programmatically by passing in a StreetViewPanoramaOptions object containing your specified options.
If you use a StreetViewPanoramaFragment object:
- Use the
StreetViewPanoramaFragment.newInstance(StreetViewPanoramaOptions options)static factory method to construct the fragment and pass in your custom configured options.
If you use a StreetViewPanoramaView object:
- Use the
StreetViewPanoramaView(Context, StreetViewPanoramaOptions)constructor and pass in your configuration options.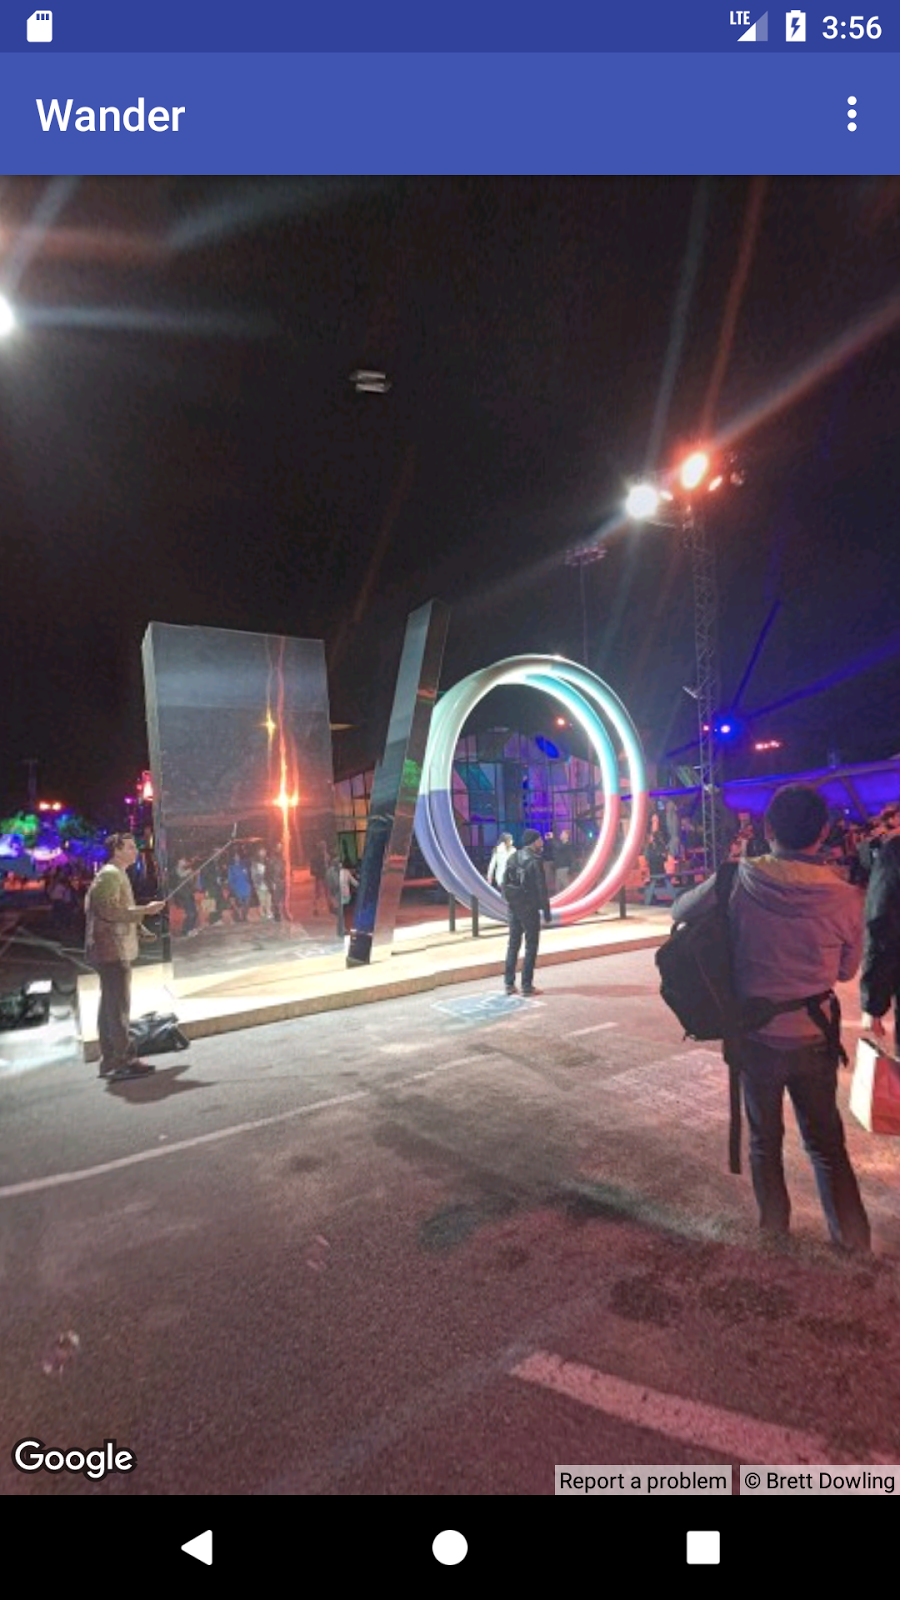
Related practical
The related practical documentation is in 9.1 P: Adding a Google Map to your app.
Learn more
Android developer documentation:
- Getting Started with the Google Maps Android API
- Adding a Map with a Marker
- Map Objects
- Adding a Styled Map
- Markers
- Shapes
- Ground Overlays
- Tile Overlays
- Events
- Street View
Reference documentation: