2.1: Building app widgets
Contents:
- What you should already KNOW
- What you will LEARN
- What you will DO
- App overview
- Task 1. Set up the app widget project
- Task 2. Create the app widget layout
- Task 3. Add app widget updates and actions
- Solution code
- Coding challenge
- Summary
- Related concept
- Learn more
An app widget is a miniature app view that appears on the Android home screen and can be updated periodically with new data. App widgets display small amounts of information or perform simple functions such as showing the time, summarizing the day's calendar events, or controlling music playback.
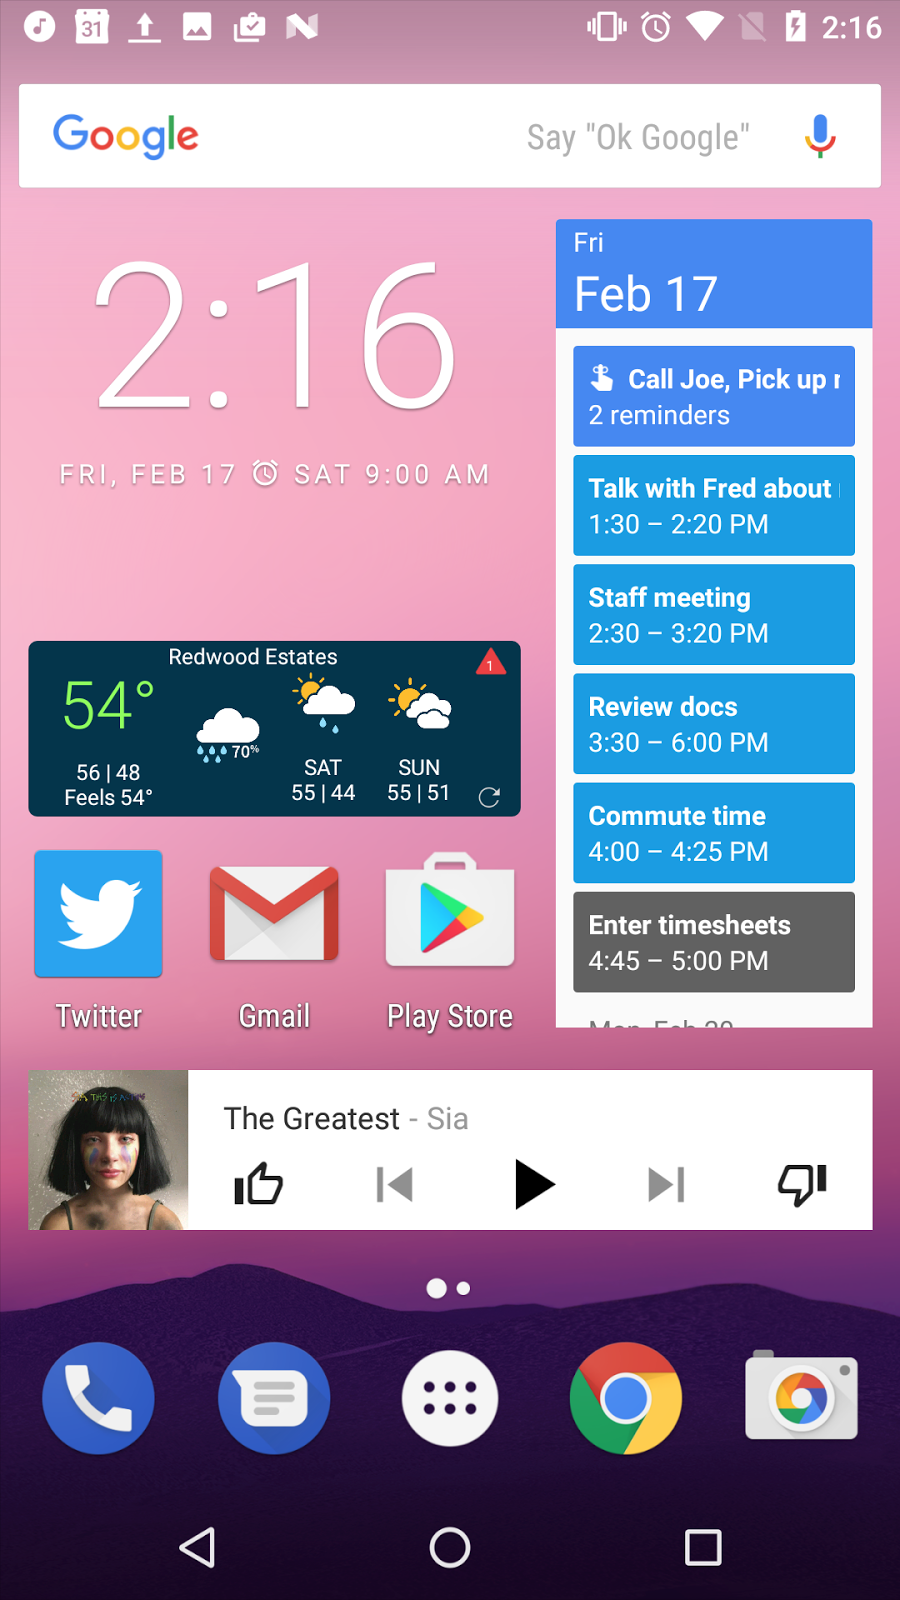
App widgets are add-ons for an existing app and are made available to users when the app is installed on a device. Your app can have multiple widgets. You can't create a stand-alone app widget without an associated app.
Users can place widgets on any home screen panel from the widget picker. To access the widget picker, touch & hold any blank space on the home screen, and then choose Widgets. Touch & hold any widget to place it on the home screen. You can also touch & hold an already-placed widget to move or resize it, if it is resizeable.
App widgets that display data can be updated periodically to refresh that data, either by the system or by the widget's associated app, through a broadcast intent. An app widget is a broadcast receiver that accepts those intents.
App widgets can also perform actions when tapped, such as launching their associated app. You can create click handlers to perform actions for the widget as a whole, or for any view of the widget layout such as a button.
In this practical, you build a simple widget that displays data, updates itself periodically, and includes a button to refresh the data on request.
What you should already KNOW
You should be familiar with:
- Creating, building, and running apps in Android Studio.
- Sending and receiving broadcast intents.
- Building and sending pending intents.
What you will LEARN
You will learn how to:
- Identify app widgets, and understand the key parts of an app widget.
- Add an app widget to your project with Android Studio.
- Understand the mechanics of app widget updates, and how to receive and handle update intents for your app widget.
- Implement app widget actions when an element of an app widget is tapped.
What you will DO
- Add an app widget to a starter project with Android Studio.
- Implement an app widget layout.
- Implement app widget updates, and learn the difference between periodic and requested updates.
App overview
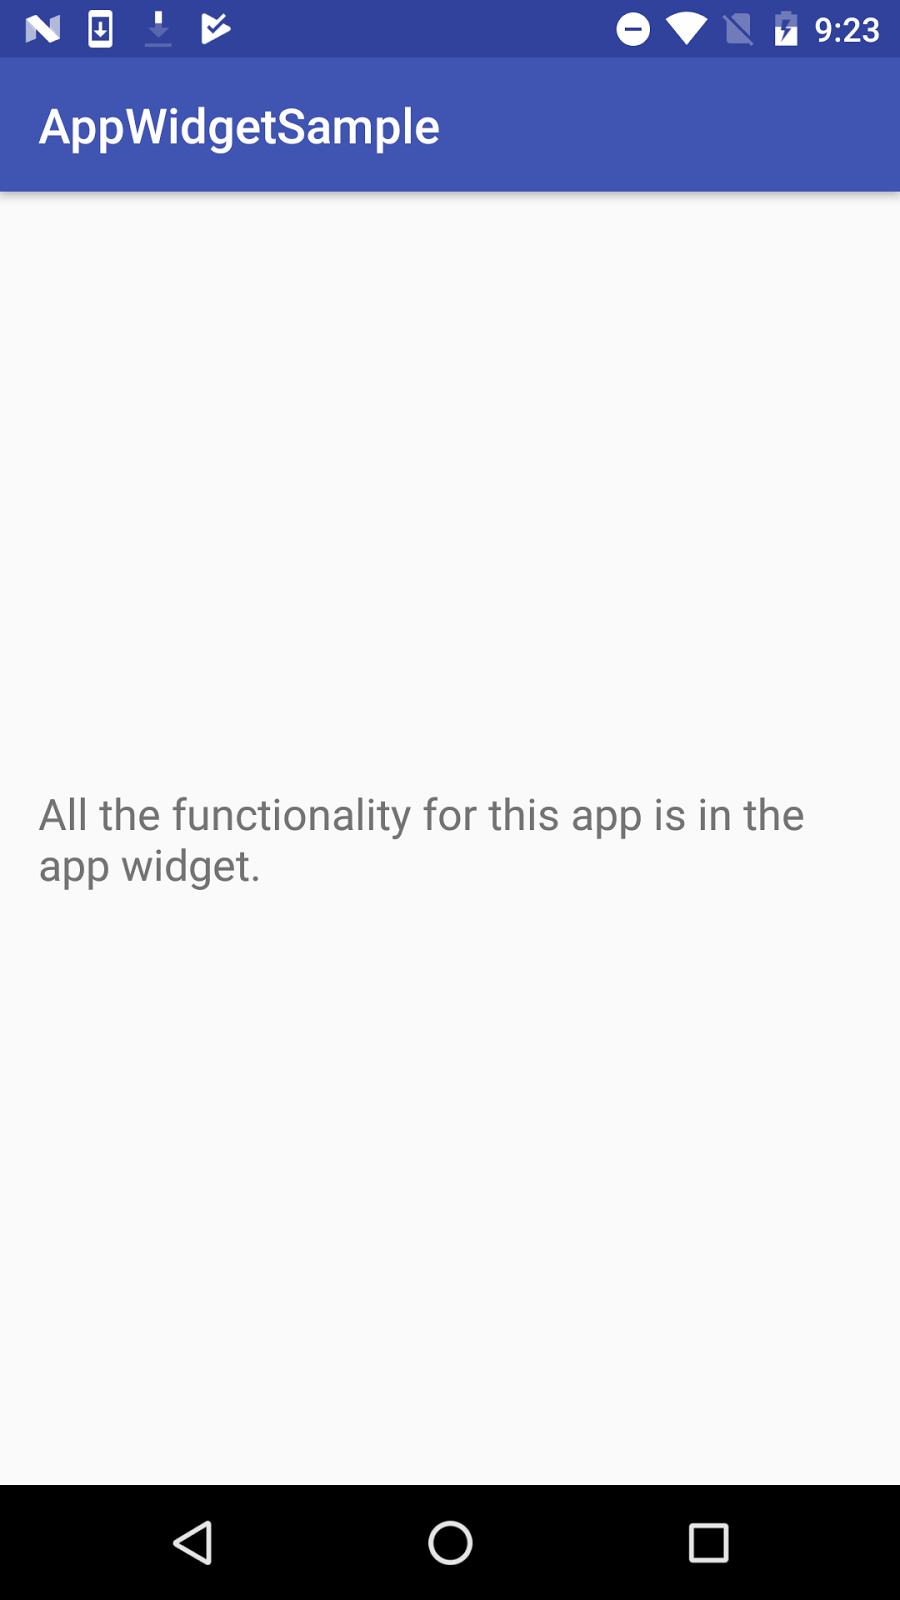
The AppWidgetSample app demonstrates a simple app widget. Because the app demonstrates app widgets, the app's main activity is minimal, with one explanatory text view:
The actual app widget has two panels for information and a button:
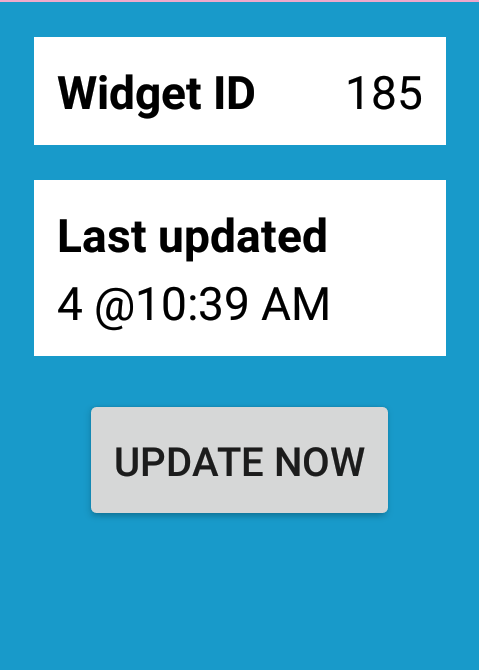
The panels display:
- The app widget ID. The user can place multiple widget instances on their home screen. An internal ID identifies each widget.
- How many times the widget has been updated, and the last update time.
- An Update now button, to request an immediate update.
Task 1. Set up the app widget project
In this task, you open the starter app for the project, add a skeleton app widget to that app with Android Studio, and explore the files for that new app widget.
1.1 Build and run the app project
- Create a new Android project. Call it
AppWidgetSampleand use the Empty activity template. - Open
res/layout/activity_main.xml. - Change the
android:textattribute of theTextViewto read "All the functionality for this app is in the app widget." Extract the string. Select File > New > Widget > AppWidget. Leave the widget name as NewAppWidget. Set the minimum width and minimum height to 2 cells. Leave all the other options as they are, and click Finish.
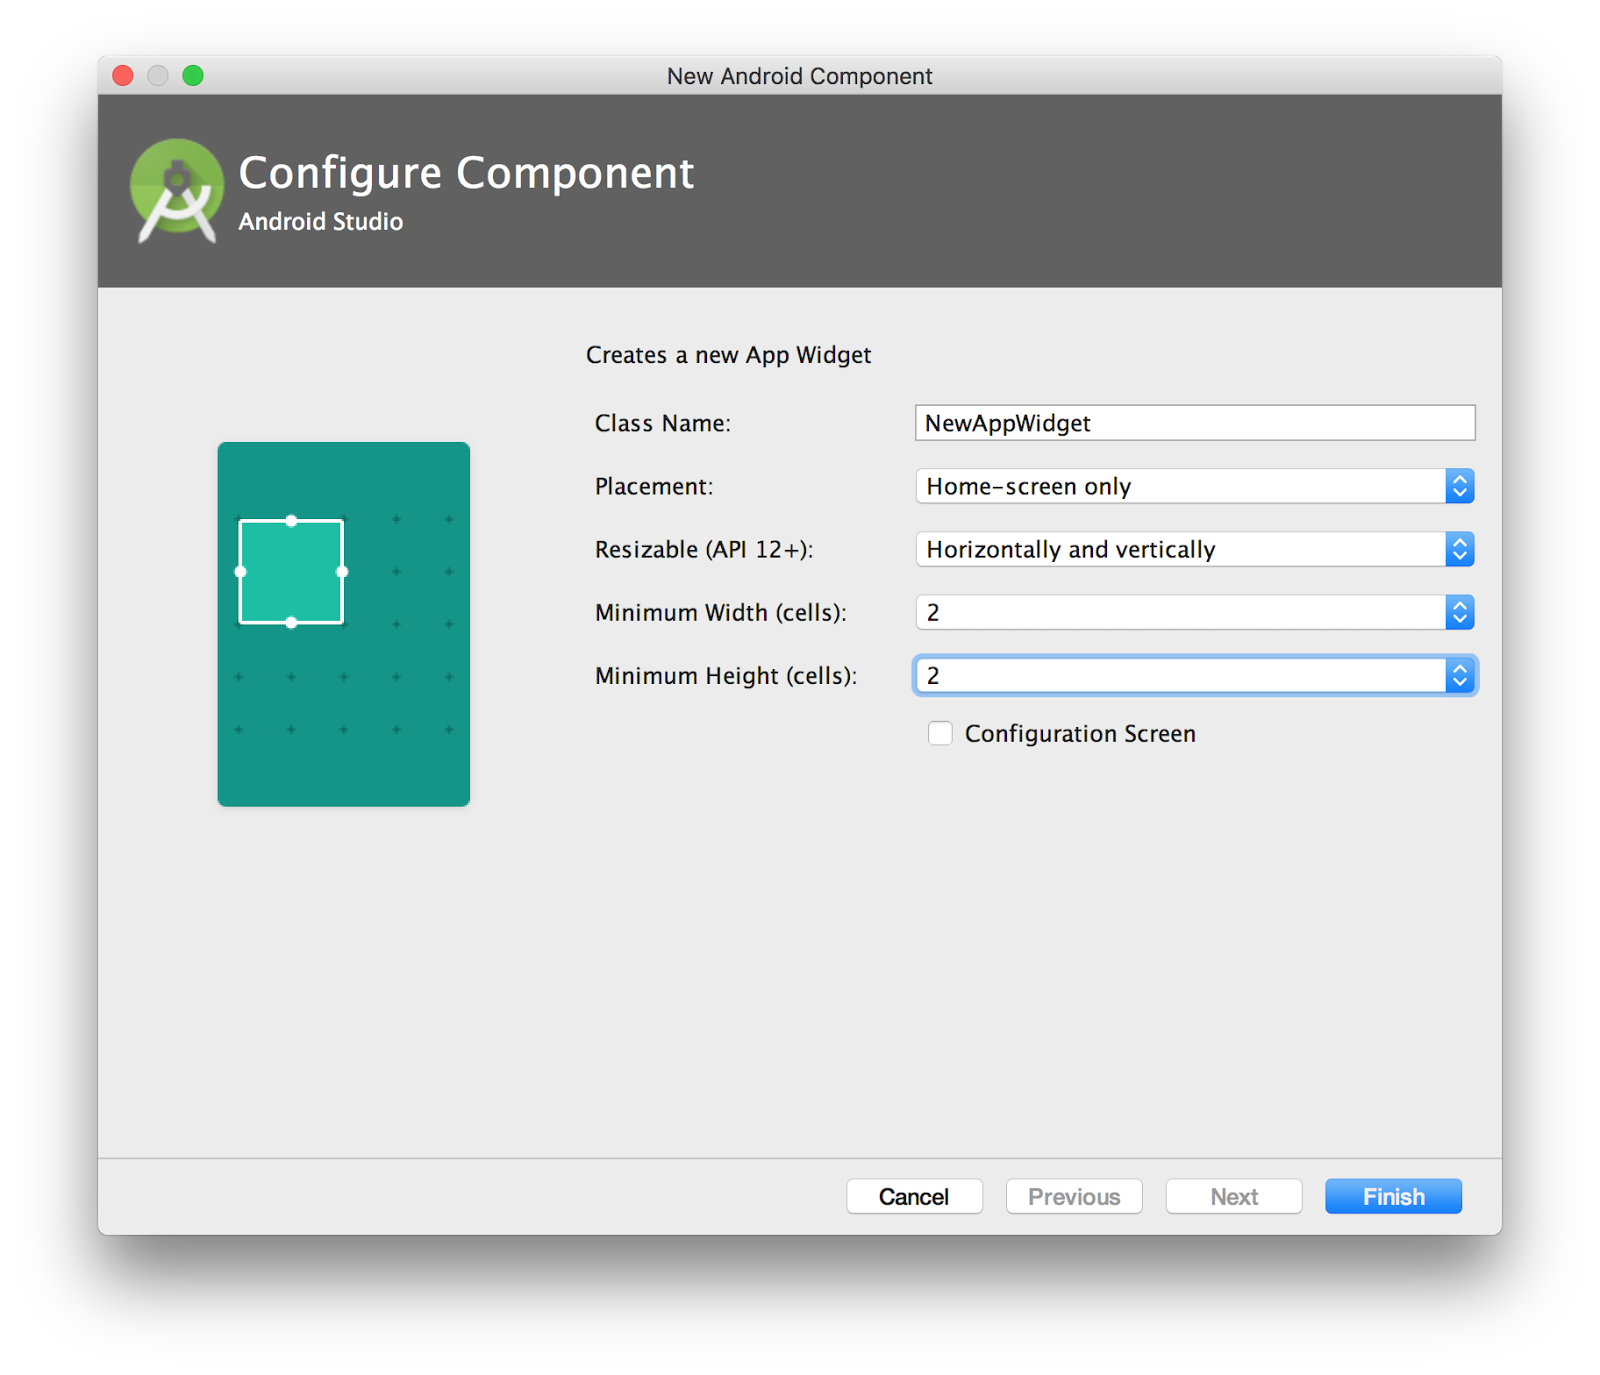
Android Studio generates all the template files you need for adding an app widget to your app. You explore those files in the next section.
Build and run the project in Android Studio.
- When the app appears, tap the home button.
- Touch & hold any empty space on the home screen, then tap Widgets. A list of available widgets appears. This screen is sometimes called the "widget picker."
Scroll down to AppWidgetSample section, and touch & hold the blue EXAMPLE widget. Place it in any empty spot on any home screen, and release.
The new widget appears on the home screen two cells wide and one cell high, the default widget size you defined when you created the widget. This sample widget doesn't do anything other than display the word EXAMPLE on a blue background.

Add another widget. You can add multiple widgets from the same app on your home screen. This functionality is mostly useful for widgets that can be configured to display customized information. For example, different weather widgets could display the weather in different locations.
- Touch & hold either of the EXAMPLE widgets. Resize handles appear on the edges of the widget. You can now move the widget or change the size of the widget to take up more than the allotted cells on the home screen.
- To remove an EXAMPLE widget from the device, touch & hold the widget and drag it to the word Remove at the top of the screen. Removing a widget only removes that particular widget instance. Neither the second widget nor the app are removed.
1.2 Explore the AppWidgetSample files
The skeleton EXAMPLE widget that Android Studio created for you generates many files in your project. In this task you explore the files.
Open
res/xml/new_app_widget_info.xml.This XML configuration file is usually called the provider-info file . The provider-info file defines several properties of your app widget, including the widget's layout file, default size, configuration activity (if any), preview image, and periodic update frequency (how often the widget updates itself, in milliseconds).
Open
res/layout/new_app_widget.xml.This file defines the layout of your app widget. App widget layouts are based on
RemoteViewselements, rather than the normalViewhierarchy, although you define them in XML the same way. Remote views provide a separate view hierarchy that can be displayed outside an app. Remote views include a limited subset of the available Android layouts and views.Open
res/drawable/example_appwidget_preview.png. This drawable is a PNG image that provides a preview of the widget itself. The preview image appears on the Android widget picker screen when the user installs your widget. The default preview image you get when you create the app widget is a blue rectangle with the word EXAMPLE. If there's no preview image, the icon for your app is used instead. The resource for the preview image is specified in the provider-info file.Open
java/values/NewAppWidget.java.This file is the widget provider , the Java file that defines the behavior for your widget. The key task for a widget provider is to handle widget update intents. App widgets extend the
AppWidgetProviderclass, which in turn extendsBroadcastReceiver.Open
res/values/dimens.xml.This default dimensions file includes a value for the widget padding of 8 dp. App widgets look best with a little extra space around the edges so that the widgets do not display edge-to-edge on the user's home screen. Before Android 4.0 (API 14), your layout needed to include this padding. After API 14 the system adds the margin for you.
Open
res/values/dimens.xml(2)/dimen.xml (v14).This dimensions file is used for Android API versions 14 and higher. The value of widget-margin in this file is 0 dp, because the system adds the margin for you.
Open
manifests/AndroidManifest.xml.In the
AndroidManifest.xmlfile, the widget provider is defined as aBroadcastReceiverwith the<receiver>tag, because theAppWidgetProviderclass extendsBroadcastReceiver. The definition also includes an intent filter with an action ofandroid.appwidget.action.APPWIDGET_UPDATE, which indicates that this app widget listens to app widget update broadcast intents. Note theandroid:resourceattribute of themeta-datatag, which specifies the widget provider-info file (new_app_widget_info).
1.3 Explore the provider-info file
Some metadata about the app widget is defined in the widget provider-info file. In this step, you explore that file and some of the metadata it contains.
- Open
res/xml/new_app_widget_info.xml. Note the
android:initialLayoutattribute.This attribute defines the layout resource that your app widget will use, in this case the
@layout/new_app_widgetlayout file.Note: The default provider-info file also includes anandroid:initialKeyguardLayoutattribute. This attribute enables you to provide a different layout for keyguard (lock screen) widgets. Previous versions of Android (4.2/API 17 to 4.4/API 19) allowed widgets to appear on the lock screen. Although the app widget tools and APIs still occasionally mention lock screen widgets, that functionality is deprecated.Note the
android:minHeightandandroid:minWidthattributes.These attributes define the minimum initial size of the widget, in dp. When you defined your widget in Android Studio to be 2 cells wide by 2 high, Android Studio fills in these values in the provider-info file. When your widget is added to a user's home screen, it is stretched both horizontally and vertically to occupy as many grid cells as satisfy the
minWidthandminHeightvalues.The rule for how many dp fit into a grid cell is based on the equation 70 × grid_size − 30, where grid_size is the number of cells you want your widget to take up. Generally speaking, you can use this table to determine what your
minWidthandminHeightshould be:# of cells (columns or rows) minWidthorminHeight1 40 dp 2 110 dp 3 180 dp 4 250 dp
Task 2. Create the app widget layout
In this task, you learn how home screen cells translate to actual widget dimensions. You create the widget layout views in the layout editor, and you edit the widget provider to build and display the layout.
2.1 Add the widget layout
- Open
res/layout/new_app_widget.xml. - Note the value for
android:paddingin the top-levelRelativeLayoutelement. This padding value is defined in thedimens.xmlfiles (@dimen/widget_margin), and varies depending on the version of Android on which the widget is running. Delete the existing
TextViewelement. Add aLinearLayoutelement inside theRelativeLayoutelement with these attributes:Attribute Value android:id"@+id/section_id"android:layout_width"match_parent"android:layout_height"wrap_content"android:layout_alignParentLeft"true"android:layout_alignParentStart"true"android:layout_alignParentTop"true"android:orientation"horizontal"style"@style/AppWidgetSection"This linear layout provides the appearance of a light-colored panel on top of a grey-blue background. The
AppWidgetSectionstyle does not yet exist and appears in red in Android Studio. (You add it later.)Inside the
LinearLayout, add aTextViewwith these attributes:Attribute Value android:id"@+id/appwidget_id_label"android:layout_width"0dp"android:layout_height"wrap_content"android:layout_weight"2"android:text"Widget ID"style"@style/AppWidgetLabel"Extract the string for the text. This text view is the label for the widget ID. The
AppWidgetLabelstyle does not yet exist.Add a second
TextViewbelow the first one, and give it these attributes:Attribute Value android:id"@+id/appwidget_id"android:layout_width"0dp"android:layout_height"wrap_content"android:layout_weight"1"android:text"XX"style"@style/AppWidgetText"You do not need to extract the string for the text in this text view, because the string is replaced with the actual ID when the app widget runs. As with the previous views, the
AppWidgetTextstyle is not yet defined.Open
res/values/styles.xml. Add the following code below theAppThemestyles to defineAppWidgetSection,AppWidgetLabel, andAppWidgetText:<style name="AppWidgetSection" parent="@android:style/Widget"> <item name="android:padding">8dp</item> <item name="android:layout_marginTop">12dp</item> <item name="android:layout_marginLeft">12dp</item> <item name="android:layout_marginRight">12dp</item> <item name="android:background">@android:color/white</item> </style> <style name="AppWidgetLabel" parent="AppWidgetText"> <item name="android:textStyle">bold</item> </style> <style name="AppWidgetText" parent="Base.TextAppearance.AppCompat.Subhead"> <item name="android:textColor">@android:color/black</item> </style>- Return to the app widget's layout file. Click the Design tab to examine the layout in the design editor. By default, Android Studio assumes that you are designing a layout for a regular activity, and it displays a default activity "skin" around your layout. Android Studio does not provide a preview for app widget designs.
TIP: To simulate a simple widget design, choose Android Wear Square from the device menu and resize the layout to be approximately 110 dp wide and 110 dp tall (the values of minWidth and minHeight in the provider-info file).
2.2 Build the widget views in the widget provider
The widget-provider class is a subclass of AppWidgetProvider. You must implement the onUpdate() method for every app widget. This method is called the first time the widget runs and again each time the widget receives an update request (a broadcast intent).
Implementing a widget update typically involves these tasks:
- Retrieve any new data that the app widget needs to display.
- Build a
RemoteViewsobject from the app's context and the app widget's layout file. - Update any views within the app widget's layout with new data.
- Tell the app widget manager to redisplay the widget with the new remote views.
Unlike activities, where you only inflate the layout once and then modify it in place as new data appears, the entire app widget layout must be reconstructed and redisplayed each time the widget receives an update intent.
- Open
java/values/NewAppWidget.java. Scroll down to the
onUpdate()method, and examine the method parameters.The
onUpdate()method is called with several arguments including the context, the app widget manager, and an array of integers that contains all the available app widget IDs.Every app widget that the user adds to the home screen gets a unique internal ID that identifies that app widget. Each time you get an update request in your provider class, you must update all app widget instances by iterating over that array of IDs.
The template code that Android Studio defines for your widget provider's
onUpdate()method iterates over that array of app widget IDs and calls theupdateAppWidget()helper method.@Override public void onUpdate(Context context, AppWidgetManager appWidgetManager, int[] appWidgetIds) { // There may be multiple widgets active, so update all of them for (int appWidgetId : appWidgetIds) { updateAppWidget(context, appWidgetManager, appWidgetId); } }When you use this template code for an app widget, you do not need to modify the actual
onUpdate()method. Use theupdateAppWidget()helper method to update each individual widget.In the
updateAppWidget()method, delete the line that gets the app widget text:CharSequence widgetText = context.getString(R.string.appwidget_text);The template code for the app widget includes this string. You won't use it for this app widget.
Modify the arguments to the
views.setTextViewText()method to update theR.id.appwidget_idview with the actualappWidgetId.views.setTextViewText(R.id.appwidget_id, String.valueOf(appWidgetId));Delete the
onEnabled()andonDisabled()method stubs.You would use
onEnabled()to perform initial setup for a widget (such as opening a new database) when the first instance is initially added to the user's home screen. Even if the user adds multiple widgets, this method is only called once. UseonDisabled(), correspondingly, to clean up any resources that were created inonEnabled()once the last instance of that widget is removed. You won't use either of these methods for this app, so you can delete them.Build and run the app. When the app launches, go to the device's Home screen.
Delete the existing EXAMPLE widget from the home screen, and add a new widget. The preview for your app widget in the widget picker still uses an image that represents the EXAMPLE widget. When you place the new widget on a home screen, the widget should show the new layout with the internal widget ID. Note that the current height of the widget leaves a lot of space below the panel for the ID. You'll add more panels soon.
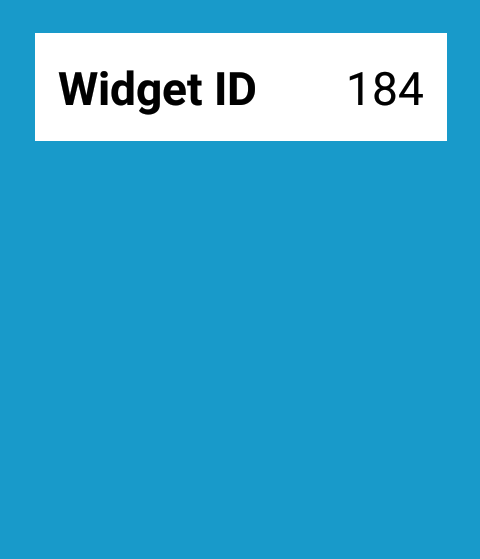 Note: Because app widgets are updated independently from their associated app, sometimes when you make changes to an app widget in Android Studio those changes do not show up in existing apps. When testing widgets make sure to remove all existing widgets before adding new ones.
Add a second copy of the app widget to the home screen. Note that each widget has its own widget ID.
Task 3. Add app widget updates and actions
The data your app widget contains can be updated in two ways:
- The widget can update itself at regular intervals. You can define the interval in the widget's provider-info file.
- The widget's associated app can request a widget update explicitly.
In both these cases the app widget manager sends a broadcast intent with the action ACTION_APPWIDGET_UPDATE. Your app widget-provider class receives that intent, and calls the onUpdate() method.
3.1 Handle periodic updates
In this task, you add a second panel to the app widget that indicates how many times the widget has been updated, and the last update time.
In the widget layout file, add a second
LinearLayoutelement just after the first, and give it these attributes:Attribute Value android:id"@+id/section_update"android:layout_width"match_parent"android:layout_height"wrap_content"android:layout_alignParentLeft"true"android:layout_alignParentStart"true"android:layout_below"@+id/section_id"android:orientation"vertical"style"@style/AppWidgetSection"Inside the new
LinearLayout, add aTextViewwith these attributes, and extract the string:Attribute Value android:id"@+id/appwidget_update_label"android:layout_width"match_parent"android:layout_height"wrap_content"android:layout_marginBottom"2dp"android:text"Last Updated"style"@style/AppWidgetLabel"Add a second
TextViewafter the first one and give it these attributes:Attribute Value android:id"@+id/appwidget_update"android:layout_width"match_parent"android:layout_height"wrap_content"android:layout_weight"1"android:text"%1$d @%2$s"style"@style/AppWidgetText"Extract the string in
android:textand give it the namedate_count_format. The odd characters in this text string are placeholder formatting code. Parts of this string will be replaced in the Java code for your app, with the formatting codes filled in with numeric values. In this case the formatting code has four parts:%1: The first placeholder.$d: The format for the first placeholder value. In this case, a decimal number.%2: The second placeholder.$s: The format for the second placeholder value (a string).
The parts of the string that are not placeholders (here, just the
@sign) are passed through to the new string. You can find out more about placeholders and formatting codes in the Formatter documentation.TIP: To see the new widget in Android Studio's Design tab, you may need to enlarge the layout by dragging the lower-right corner downward.In the app widget provider-info file (
res/xml/new_app_widget_info.xml), change theandroid:minHeightattribute to180dp.android:minHeight="180dp"When you add more content to the layout, the default size of the widget in cells on the home screen also needs to change. This iteration of the app widget is 3 cells high by 2 wide, which means
minHeightis now 180 dp andminWidthremains 110 dp.Also in the provider-info file, change
android:updatePeriodMillisto1800000.The
android:updatePeriodMillisattribute defines how often the app widget is updated. The default update interval is 86,400,000 milliseconds (24 hours). 1,800,000 milliseconds is a 30 minute interval. If you setupdatePeriodMillisto less than 1,800,000 milliseconds, the app widget manager only sends update requests every 30 minutes. Because updates use system resources, even if the associated app is not running, you should generally avoid frequent app widget updates.In the app widget provider (
NewAppWidget.java), add static variables to the top of the class for shared preferences. You'll use shared preferences to keep track of the current update count for the widget.private static final String mSharedPrefFile = "com.example.android.appwidgetsample"; private static final String COUNT_KEY = "count";At the top of the
updateAppWidget()method, get the value of the update count from the shared preferences, and increment that value.SharedPreferences prefs = context.getSharedPreferences( mSharedPrefFile, 0); int count = prefs.getInt(COUNT_KEY + appWidgetId, 0); count++;The key to get the current count out of the shared preferences includes both the static key
COUNT_KEYand the current app widget ID. Each app widget may have a different update count so each app widget needs its own entry in the shared preferences.Get the current time and format it as a short string (
DateFormat.SHORT):String dateString = DateFormat.getTimeInstance(DateFormat.SHORT).format(new Date());You will need to import both the
DateFormat(java.text.DateFormat) andDate(java.util.Date) classes.After updating the text view for
appwidget_id, add a line to update theappwidget_updatetext view. This code gets the date format string from the resources and substitutes the formatting codes in the string with the actual values for the number of updates (count) and the current update time (dateString):views.setTextViewText(R.id.appwidget_update, context.getResources().getString( R.string.date_count_format, count, dateString));After constructing the
RemoteViewsobject and before requesting the update from the app widget manager, put the current update count back into shared preferences:SharedPreferences.Editor prefEditor = prefs.edit(); prefEditor.putInt(COUNT_KEY + appWidgetId, count); prefEditor.apply();As with the earlier lines where you retrieved the count from the shared preferences, here you store the count with a key that includes
COUNT_KEYand the app widget ID, to differentiate between different counts.Compile and run the app. As before, make sure you remove any existing widgets.
Add two widgets to the home screen, at least one minute apart. The widgets will have the same update count (1) but different update times.
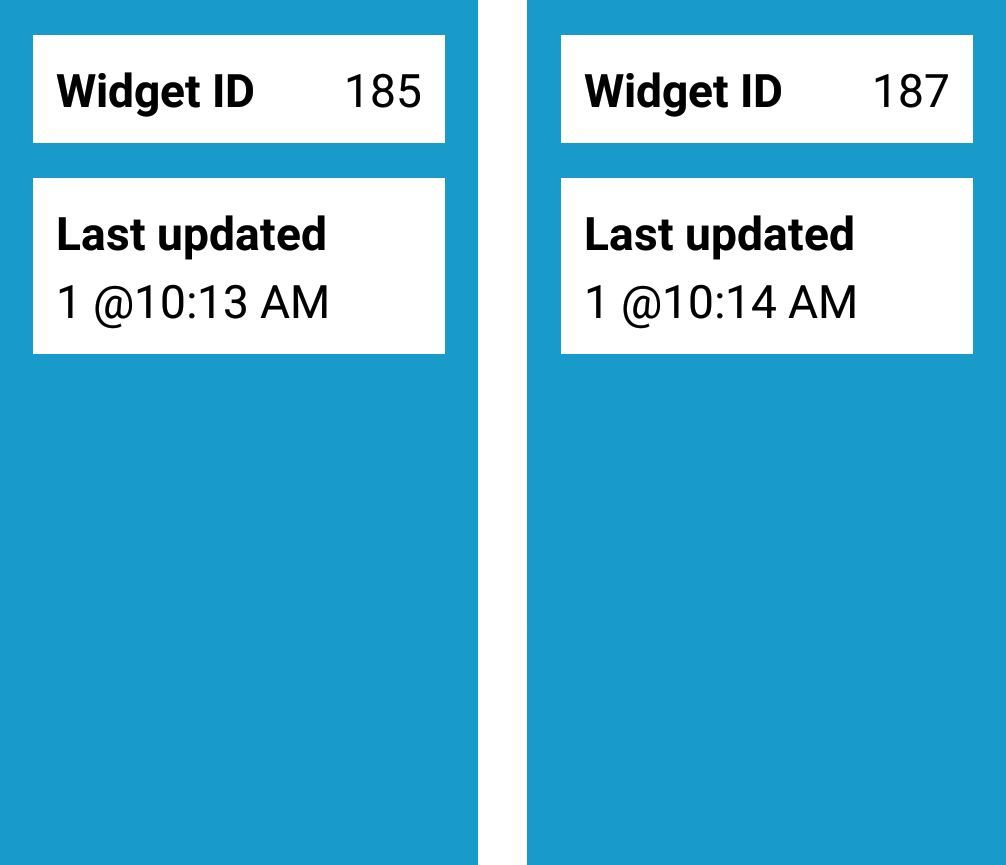
At each half an hour interval after you add an app widget to the home screen, the Android app widget manager sends an update broadcast intent. Your widget provider accepts that intent, increments the count and updates the time for each widget. You could wait half an hour to see the widgets update itself, but in the next section you add a button that manually triggers an update.
The automatic update interval is timed from the first instance of the widget you placed on the home screen. Once that first widget receives an update request, then all the widget instances are updated at the same time.
3.2 Add an update button
In this last task, you add a button to the widget that explicitly requests a widget update with a broadcast intent. With this button you can update your widgets on request without waiting for the widget manager to get around to updating your widgets.
In the widget layout file, add a
Buttonelement just below the secondLinearLayout, and give it these attributes:Attribute Value android:id"@+id/button_update"android:layout_width"wrap_content"android:layout_height"wrap_content"android:layout_below"@+id/section_update"android:layout_centerHorizontal"true"android:text"Update now"style"@style/AppWidgetButton"Again, you may need to enlarge the widget in the Design tab.
In
styles.xml, add this style for the button:<style name="AppWidgetButton" parent="Base.Widget.AppCompat.Button"> <item name="android:layout_marginTop">12dp</item> </style>In your
AppWidgetProviderclass, in theupdateAppWidget()method, create an intent and set that intent's action toAppWidgetManager.ACTION_APPWIDGET_UPDATE. Add these lines just after you save the count to the shared preferences, and before the final call toappWidgetManager.updateAppWidget().Intent intentUpdate = new Intent(context, NewAppWidget.class); intentUpdate.setAction(AppWidgetManager.ACTION_APPWIDGET_UPDATE);The new intent is an explicit intent with the widget-provider class (
NewAppWidget.class) as the target component.After the lines to create the intent, create an array of integers with only one element: the current app widget ID.
int[] idArray = new int[]{appWidgetId};Add an intent extra with the key
AppWidgetManager.EXTRA_APPWIDGET_IDS, and the array you just created.intentUpdate.putExtra(AppWidgetManager.EXTRA_APPWIDGET_IDS, idArray);The intent needs an array of app widget IDs to update. In this case there's only the current widget ID, but that ID still needs to be wrapped in an array.
Use the
PendingIntent.getBroadcast()method to wrap the intent as a pending intent that will perform a broadcast.PendingIntent pendingUpdate = PendingIntent.getBroadcast( context, appWidgetId, intentUpdate, PendingIntent.FLAG_UPDATE_CURRENT);You use a pending intent here because the app widget manager sends the broadcast intent on your behalf.
Set the
onClicklistener for the button to send the pending intent. Specifically for this action, theRemoteViewsclass provides a shortcut method calledsetOnClickPendingIntent().views.setOnClickPendingIntent(R.id.button_update, pendingUpdate);TIP: In this step, a single view (the button) sends a pending intent. To have the entire widget send a pending intent, give an ID to the top-level widget layout view. Specify that ID as the first argument in the
setOnClickPendingIntent()method.Compile and run the app. Remove all existing app widgets from the home screen, and add a new widget. When you tap the Update now button, both the update count and the time update.

Add a second widget. Confirm that tapping the Update now button in one widget only updates that particular widget and not the other widget.
Solution code
Android Studio project: AppWidgetSample
Coding challenge
Challenge: Update the widget preview image with a screenshot of the actual app widget.
Summary
- An app widget is a miniature app view that appears on the Android home screen. App widgets can be updated periodically with new data. To add app widgets to your app in Android Studio, use File > New > Widget > AppWidget. Android Studio generates all the template files you need for your app widget.
- The app widget provider-info file is in
res/xml/. This file defines several properties of your app widget, including its layout file, default size, configuration activity (if any), preview image, and periodic update frequency. - The app widget provider is a Java class that extends
AppWidgetProvider, and implements the behavior for your widget—primarily handling managing widget update requests. TheAppWidgetProviderclass in turn inherits fromBroadcastReceiver. Because widgets are broadcast receivers, the widget provider is defined as a broadcast receiver in theAndroidManifest.xmlfile with the<receiver>tag. - App widget layouts are based on remote views , which are view hierarchies that can be displayed outside an app. Remote views provide a limited subset of the available Android layouts and views.
When placed on the home screen, app widgets take up a certain number of cells on a grid. The cells correspond to a specific minimum width and height defined in the widget provider file. The rule for how many dp fit into a grid cell is based on the equation 70 ×
grid_size− 30, wheregrid_sizeis the number of cells you want your widget to take up. In general, cells correspond to these dp values:# of columns or rows minWidthorminHeight1 40 dp 2 110 dp 3 180 dp 4 250 dp App widgets can receive periodic requests to be updated through a broadcast intent. An app widget provider is a broadcast receiver which accepts those intents. To update an app widget, implement the
onUpdate()method in your widget provider.- The user may have multiple instances of your widget installed. The
onUpdate()method should update all the available widgets by iterating over an array of widget IDs. - The app widget layout is updated for new data in the
onUpdate()method by rebuilding the widget's layout views (RemoteViews), and passing thatRemoteViewsobject to the app widget manager. - App widget actions are pending intents. Use the
onClickPendingIntent()method to attach an app widget action to a view. - Widget updates can be requested with a pending intent whose intent has the action
AppWidgetManager.ACTION_APPWIDGET_UPDATE. An extra,AppWidgetManager.EXTRA_APPWIDGET_IDS, contains an array of app widget IDs to update.
Related concept
The related concept documentation is in App Widgets.
