
Now available as codelabs!
The practical workbook for the Advanced Android Development course is now available as a series of Codelabs. Visit the course overview for more information.
4.1B: Using the Debug GPU Overdraw and Layout Inspector tools
Contents:
- What you should already KNOW
- What you will LEARN
- What you will DO
- App overview
- Task 1. Visualize overdraw with Debug GPU Overdraw
- Task 2. Inspect the view hierarchy
- Solution code
- Summary
- Related concept
- Learn more
You can make your apps interesting and visually compelling by following Material Design guidelines, creating nested hierarchies of layouts, and using drawables as background elements for your views. However, with increasing complexity come performance challenges, and layouts draw faster and use less power and battery if you spend time designing them in the most efficient way. For example:
- Overlapping views result in overdraw , where the app wastes time drawing the same pixel multiple times, and only the final rendition is visible to the user. Size and organize your views so that every pixel is only drawn once or twice.
- Deeply nested layouts force the Android system to perform more passes to lay out all the views than if your view hierarchy is flat.
- To simplify your view hierarchy, combine, flatten, or eliminate views.
What you should already KNOW
You should be able to:
- Create apps with Android Studio and run them on a mobile device.
- Work with the Developer options settings on a mobile device.
What you will LEARN
You will learn how to:
- Run the Debug GPU Overdraw tool to visualize Android drawing to the screen.
- Use the Layout Inspector tool to inspect the view hierarchy of an app.
What you will DO
- Create a testing app, StackedViews, to illustrate overdraw.
- Run the Debug GPU Overdraw tool on the StackedViews app.
- Fix the StackedViews app to reduce overdraw.
- Use the Layout Inspector tool to identify how you could simplify the view hierarchy.
App overview
The StackedViews app arranges three overlapping TextView objects inside a ConstraintLayout to demonstrate overdraw. While this is a contrived and simplistic example, overlapping views can easily happen during development as you add more features and complexity to your app. The screenshot below shows an arrangement of three overlapping views. View 1 fills the screen. View 2 fills the bottom two thirds of the screen. View 3 fills the bottom third of the screen to create progressively more overlap.

Task 1. Visualize overdraw with Debug GPU Overdraw
One possible cause for slow rendering performance is overdraw, which is when your app draws over the same area multiple times, but the user sees only what has been drawn last. This can result in performance problems, especially for older or less powerful devices.
Learn more about overdraw in the Rendering and layout concept chapter.
1.1 Create an app to illustrate overdraw
Create an app called StackedViews that stacks views on top of each other.
- Create an app using the Empty template, which uses
ConstraintLayout. - Set a light gray background on the
ConstraintLayout. - Add a
TextViewelement where the width and height match the parent. Set a light gray background, such as#fafafa. - Add a second, overlapping,
TextViewelement. Make the width match the parent. Make the height about three quarters of the height from the bottom. You can do this by making the height match the parent, then uselayout_marginTopto add space at the top. Use a darker gray background, such as #e0e0e0. - In the same way, add a third, overlapping
TextViewelement that fills the width of the parent and about half of the height from the bottom. Use an even darker gray background, such as#bdbdbd. - Optionally, use a large font such as
@style/TextAppearance.AppCompat.Display1for theTextViews. - Run the app on your device. It should look similar to the screenshot below, with three progressively more overlapping views.
Your final code should look similar to this:
<android.support.constraint.ConstraintLayout
    xmlns:android="http://schemas.android.com/apk/res/android"
    xmlns:app="http://schemas.android.com/apk/res-auto"
    xmlns:tools="http://schemas.android.com/tools"
    android:layout_width="match_parent"
    android:layout_height="match_parent"
    tools:context="com.example.android.stackedviews.MainActivity"
    android:background="@android:color/background_light">

    <TextView
        android:id="@+id/view1"
        android:layout_width="match_parent"
        android:layout_height="match_parent"
        android:background="@color/very_light_gray"
        android:text="@string/view1"
        android:textAppearance="@style/TextAppearance.AppCompat.Display1"
        app:layout_constraintBottom_toBottomOf="parent"
        app:layout_constraintLeft_toLeftOf="parent"
        app:layout_constraintRight_toRightOf="parent"
        app:layout_constraintTop_toTopOf="parent" />

    <TextView
        android:id="@+id/view2"
        android:layout_width="match_parent"
        android:layout_height="match_parent"
        android:layout_marginTop="156dp"
        android:background="@color/light_gray"
        android:text="@string/view2"
        android:textAppearance="@style/TextAppearance.AppCompat.Display1"
        app:layout_constraintBottom_toBottomOf="parent"
        app:layout_constraintLeft_toLeftOf="parent"
        app:layout_constraintRight_toRightOf="parent"
        app:layout_constraintTop_toTopOf="parent" />

    <TextView
        android:id="@+id/view3"
        android:layout_width="match_parent"
        android:layout_height="match_parent"
        android:layout_marginTop="300dp"
        android:background="@color/medium_gray"
        android:text="@string/view3"
        android:textAppearance="@style/TextAppearance.AppCompat.Display1"
        app:layout_constraintBottom_toBottomOf="parent"
        app:layout_constraintLeft_toLeftOf="parent"
        app:layout_constraintRight_toRightOf="parent"
        app:layout_constraintTop_toTopOf="parent" />

</android.support.constraint.ConstraintLayout>
1.2 Turn on Debug GPU Overdraw on your device
Make sure developer options is turned on. Turn on USB Debugging, and allow it when prompted.
Turn on Debug GPU Overdraw on your mobile device:
- Go to Settings > Developer options.
- In the Hardware accelerated rendering section, select Debug GPU Overdraw.
- In the Debug GPU overdraw dialog, select Show overdraw areas.
- Watch your device turn into a rainbow of colors. The colors hint at the amount of overdraw on your screen for each pixel.
The following key shows which colors indicate how much overdraw.
| True color has no overdraw. | |
|
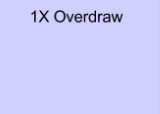
Purple/blue is overdrawn once. |
|
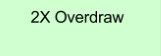
Green is overdrawn twice. |

|
Pink is overdrawn three times. |

|
Red is overdrawn four or more times. |
An app with too much overdraw will have a lot of pink and red coloring, as shown in the screenshot below.

A properly laid out app has little overdraw and primarily show true and purple coloring, as shown in the screenshot below. Some overdraw is unavoidable, for example, when drawing text onto a background.

- Run the StackedViews app. The screen should look similar to the one below, with green, pink, and red colors that indicate significant areas of overdraw where the
TextViewobjects overlap.
Important: If it's hard for you to see the difference between the colors that the tool shows, try adjusting the tool for deuteranomaly:
- Go to Settings > Developer options.
- In the Hardware accelerated rendering section, select Debug GPU Overdraw.
- In the Debug GPU overdraw dialog, select Show areas for Deuteranomaly to show overdraw using adjusted colors.

Compare the colors of the views in this app with the color key shown above, and you see that View 3 and View 2 are colored for 3x and 4x overdraw. This is because as laid out in the XML file, you stacked the views on top of each other. A ConstraintLayout with a background is the bottom layer, and View 1 is drawn on top of that, so View 1 is overdrawn twice, and so on.
In a real-world app, you would not use a layout like this, but remember that this is a simple example to demonstrate the tool. Common, realistic examples that produce overdraw include:
- Lists with items that contain thumbnails, text, and controls.
- Custom views, such as custom menus or drawers.
- Views that overlap with other views for any reason.
1.3 Fix overdraw
Fixing overdraw can be as basic as removing invisible views, and as complex as re-architecting your view hierarchy. To fix overdraw, you usually need to take one or more of the following actions.
- Eliminate unnecessary backgrounds, for example, when a
Viewdisplays an image that fills it, the background is completely covered, so it can be removed. - Remove invisible views. That is, remove views that are completely covered by other views.
- In custom views, clip generously. (See Rendering and Layout. You learn about custom views in another chapter.)
- Reduce the use of transparency. For example, instead of using transparency to create a color, find a color. Instead of using transparency to create a shine-through effect for two overlapping images, preprocess the two images into one.
- Flatten and reorganize the view hierarchy to reduce the number of views. See the Rendering and Layout concept chapter for examples and best practices.
- Resize or rearrange views so they do not overlap.
To reduce overdraw for the StackedViews app, rearrange the views in the app so that they do not overlap. In the XML code:
- Remove the background of the
ConstraintLayout, because it's invisible. - Set the
layout_widthandlayout_heightof each view to0dp. - Remove
layout_marginTopfor view2 and view3, or set it to0dp. - Use constraints to lay out the views relative to each other.
The following code shows the constraints for each view:
   <TextView
        android:id="@+id/view1"
      ...
        app:layout_constraintBottom_toTopOf="@+id/view2"
        app:layout_constraintLeft_toLeftOf="parent"
        app:layout_constraintRight_toRightOf="parent"
        app:layout_constraintTop_toTopOf="parent" />

    <TextView
        android:id="@+id/view2"
       ...
        app:layout_constraintBottom_toTopOf="@+id/view3"
        app:layout_constraintLeft_toLeftOf="parent"
        app:layout_constraintRight_toRightOf="parent"
        app:layout_constraintTop_toBottomOf="@+id/view1" />

    <TextView
        android:id="@+id/view3"
        ...
        app:layout_constraintBottom_toBottomOf="parent"
        app:layout_constraintLeft_toLeftOf="parent"
        app:layout_constraintRight_toRightOf="parent"
        app:layout_constraintTop_toBottomOf="@+id/view2" />
Your final layout should produce output from Debug GPU Overdraw similar to one of the images below. (The second image shows overdraw for deuteranomaly.) You draw once for the background, and on top of that, the text.


In a realistic setting without custom views, overdraw may not be a huge performance problem for your app since the Android framework optimizes drawing the screen. However, since overdraw is usually straightforward to find and fix, you should always minimize it so it does not pollute your other performance data.
Task 2. Inspect the view hierarchy
The process of rendering views to the screen includes a measure-and-layout stage, during which the system appropriately positions the relevant items in your view hierarchy. The "measure" part of this stage determines the sizes and boundaries of View objects. The "layout" part determines where on the screen to position the View objects.
The following recommendations cover the most common cases:
Remove views that do not contribute to the final image.
Eliminate from your code the views that are completely covered, never displayed, or outside the screen. This seems obvious, but during development, views that later become unnecessary can accumulate.
Flatten the view hierarchy to reduce nesting
Android Layouts allow you to nest UI objects in the view hierarchy. This nesting can impose a cost. When your app processes an object for layout, the app performs the same process on all children of the layout as well.
Keep your view hierarchy flat and efficient by using ConstraintLayout wherever possible.
Reduce the number of views
If your UI has many simple views, you may be able to combine some of them without diminishing the user experience.
- Combining views may affect how you present information to the user and will include design trade-offs. Opt for simplicity wherever you can.
- Reduce the number of views by combining them into fewer views. For example, you may be able to combine
TextViewobjects if you reduce the number of fonts and styles.
Simplify nested layouts that trigger multiple layout passes
Some layout containers, such a RelativeLayout, require two layout passes in order to finalize the positions of their child views. As a result, their children also require two layout passes. When you nest these types of layout containers, the number of layout passes increases exponentially with each level of the hierarchy. See the Optimizing View Hierarchies documentation and the Double Layout Taxation video.
Be conscious of layout passes when using:
RelativeLayoutLinearLayoutthat also usemeasureWithLargestChildGridViewthat also usegravity- Custom view groups that are subclasses of the above
- Weights in
LinearLayout, which can sometimes trigger multiple layout passes
Using any of the above view groups as the root of a complex view hierarchy, the parent of a deep subtree, or using many of them in your layout, can hurt performance. Consider whether you can achieve the same layout using a view group configuration that does not result in these exponential numbers of layout passes, such as a ConstraintLayout.
2.1 Inspect your app's layout with Layout Inspector
The Layout Inspector is a tool in Android Studio that allows you see your view hierarchy at runtime.
Design view shows you the static layout of an activity as defined in your XML files, but it does not include any views that you might create, destroy, or move at runtime.
Inspecting the view hierarchy can show you where you might simplify your view hierarchy. In addition, the Layout Inspector can also help you identify overlapping views. If Debug GPU Overdraw shows that your app has overdraw, you may need to run Layout Inspector to identify the exact views involved, or to help you determine which views you might be able to rearrange.
With Layout Inspector you take a snapshot of the view hierarchy of a running app and display it for inspection.
2.2 Find overlapping views
If your layout includes completely overlapping views, then by default, only the front-most view is clickable in the screenshot. To make the view behind clickable, right-click the front-most view in the View Tree panel and uncheck Show in preview, as follows:
- In your code, change the size of View 2 to completely cover View 3. In the layout for
@id/view3, setandroid:layout_marginTop="156dp" - Run the app.
Open the Layout Inspector. Tools > Android > Layout Inspector.
In the preview, you can only see outlines around View 1 and View 3, which are on top.
In the Tree View, right-click View 3 and deselect Show in preview.
- In the Tree View, right-click View 1 and deselect Show in preview.
- Click
ConstraintLayoutin the Tree View. Now if you mouse over the preview, the only outline you see is around the hidden View 2, and View 2 is highlighted in Tree View.
Layout Inspector does not connect to your running app. It creates a static capture based on your code.
You can find the captures Android Studio made in the captures folder of your Android Studio project. The files use the package name and the date, and have a .li extension (for example, com.example.android.largimages_2017.4.12_12.01.li). In Project view, expand the captures folder and double-click any capture file to show its contents.
Inspecting the view hierarchy, the view arrangement and boundaries, and the properties of each view can help you determine how to optimize your app's view hierarchy.
Solution code
Android Studio projects:
- StackedViews_with_overdraw – initial version of the StackedViews app with overdraw issues.
- StackedViews_fixed – final version of the StackedViews app after the overdraw issues have been fixed.
Summary
- Use the Debug GPU Overdraw tool to identify overlapping views.
- Reduce overdraw by removing unused backgrounds and invisible views; use clipping to reduce overlapping of views.
- Use the Layout Inspector to investigate your view hierarchy.
- Simplify your view hierarchy by flattening the hierarchy, combining views, eliminating invisible views, or rearranging your layout.
Related concept
The related concept documentation is in Rendering and layout.